Showing posts with label DIY. Show all posts

Monday, 3 March 2014

Spontaneous & Fast Project

Last Thursday evening Philip headed off to a Jets game and I was feeling mega burnt out from the work week and ready for an evening of relaxing. I didn't feel like making dinner, let alone doing anything productive.

Philip left, I made myself a snack, and I sat down to watch some Netflix. A little bit into TV I went to catch up on blog reading and came across this Apartment Therapy article about simple DIY projects to do this weekend. I looked at all the articles, and after reading this one, I decided to do a quick change in our kitchen that I thought might tide me over until the big reno happens.


Our kitchen cooking area can be pretty tight, and I get lonely cooking in there alone! Sometimes Philip sits at the kitchen table and chats with me while I cook, but then I have to open the cupboard doors in order to see him at all. I have to admit I'm not that trendy when it comes to the open shelf trend, I find things get dusty and I just don't have enough pretty things that I feel like displaying in my kitchen, but I did think this might make the some-day-to-be-changed kitchen layout feel a little more welcoming and fit our lifestyle better. I decided to get out the screwdriver and take off the doors on the kitchen side of the peninsula.

It took 4 screwdriver bits, about an hour, and the removal of 18 screws, in addition to the wiping of ancient 1960s sawdust, but it was worth it!


The removal of the doors, along with the wonderful yellow tulips I got last week from a friend, are turning our kitchen into a smilier place by the day :).

One of the best things about this I realized after the light of day happened the next morning is that it lets the light from the kitchen area window flood the whole space. It really helps things to feel brighter!

Happy Monday!


Thursday, 28 February 2013

Unhouserelated DIY

This is slightly off topic, but is still DIY so I figured I'd share it. Plus it's a real money-saver which we can all use!

Yesterday I cut Philip's hair, something I started doing about a year ago and we've kept going ever since. For those of you who have a husband/boyfriend who spends $20 every couple months on a less than extraordinary haircut, here's how you can change that.


This was how long Philip's hair was when we first started dating...agh. 


1. Buy Clippers. 
I bought ours at Winners for $16.99, it's probably not the best one ever - it doesn't seem super powerful, but it does the job and pays for itself in one use so even if it doesn't last us forever it still was worth the money. You can find it in the gift section at Winners, in between the sauna suits and the iphone cases (this is not an exact description of where it is, just examples of some of the wacky things that are also sold in this section), feel free to pick up a nose hair trimmer while you're there. 

2. Prep. 
Philip usually gets his haircut shirtless - scandal! - and then you can use a cape if your clippers came with them (ours didn't but my parents did), or like we did yesterday we just put a sheet around him which worked out pretty well and then we just washed it after. We also got a garbage bag ready which Philip held while I cut so that when there were big chunks I could throw them straight out instead of having to vacuum it all up after. 

3. Choose a Length. 
The first few times I cut his hair we started with a longer length and worked our way down slowly until we knew what length he liked so that we wouldn't accidentally go too short. Now we just go straight for #2. It looks good and only takes a couple weeks to grow in a little so it makes sense to us to go pretty short. 

4. Cut Cut Cut
I just do the whole thing the same length, because I'm not coordinated enough to do different lengths and have it look good - I couldn't even do my own ponytail until high school, so I'm not about to try and do a fancy haircut. It looks good on Philip though so it works for us. 
Once I'm done we look in the mirror for anything that looks off, I trim around his ears and neck and we're good to go!

5. Clean Up
Vacuum, shower, etc. 

6. Routine
One thing we haven't got down yet is making this a regular occurrence  this last haircut was needed for a very very very long time, and it makes it a lot harder to cut because the clippers get caught up in thick long hair so I have to go over it a bunch, if we did it every month or so it would be so easy to maintain. This one we also held off a bit because Philip was afraid his head would get cold walking to the bus and everything, but it's starting to warm up so we figured it was worth it. 


Post Haircut Philip Wiebe


So that's how you can save $10/month or so on haircuts! It's easy enough and so convenient because Philip never needs to head out to the hairdresser. Also it only took about half an hour which isn't too bad. 

Anyone else cut their own hair? More money saving beauty tips? 

Friday, 4 January 2013

DIY Gift: Vow Art

Yesterday you heard about my date jar gift to Philip, and so today we'll be talking about the homemade gift that I received from Philip. While it is Friday and Philip is the typical author of today's post, he's busy enough writing the drama for our church's dinner theater (at Eastview around Valentine's Day if you want to mark your calendars), so I'm taking this one for the team. I won't try to incorporate him in this post with a painting like I did my date jar yesterday (phone randomly fixed itself, so there is an actual photo over there today!)

When preparing to write this post he emailed me everything I'd need to know about how he came to make this beautiful craft, and so hopefully I can do it justice.

After seeing some great pieces of art that featured wedding vows or other wedding memorabilia, I had been hinting pretty heavily that I'd like something similar. Here are a few of the pieces that I had shown to Philip but didn't want to buy because I knew Philip could easily make something amazing and it would be more meaningful than buying it off Etsy.


I heart this personalized print from Silhouette Blue.


While I don't need Train lyrics on my wall,
 I like the graphic feel from Alexander Creative.
I really love the idea of personalized art (I think I've mentioned that before), and so it was really thoughtful of Philip to take that into consideration and make me an amazing Christmas gift.

Philip started with a completely different idea than what he ended up with. Beginning with an owl inspired (due to the owl trend that's invading the stores these days - and I might have allowed it to come into our house a bit) piece. 

While this is really cute,
I'm so much happier with what Philip ended up with!

The goal with the owl artwork was a layered and textured feel, looking custom and professional, but also really cute and fun. It didn't work out because pencil crayon on black construction paper didn't work as well as Philip had hoped, and the owls ended up looking a lot more juvenile (although I do still love the owls that he made and will definitely hang them somewhere) than what the content would call for. 

I'll still give a bit of a run through on how to make the artwork above, if it's your groove.

Philip started by printing the vows and adhering them to black construction paper with Post-Its (so that the construction paper wouldn't be damaged when it was removed). This way he could trace the letters onto the construction paper below to achieve the font and look he'd planned. 

An innovative use of Post-Its. 

Philip had designed the owls ahead of time on the computer so he had a plan when it came time to craft.


Cutie owls, I do still really like them!

After creating the owls virtually, cutting them out of construction paper in layers was a lot easier and well planned out. It turned out so adorable! I can't wait to hang them up. Have I mentioned how talented my husband is? I couldn't make that on the computer, and I'm definitely not a master of using scissors, can't even imagine how long it would take me to make that tree trunk out of the different papers, let alone the owls. 


The most beautiful construction paper craft I've seen to date.


These owls get their close up.
Anyway, this craft didn't work out for reasons mentioned above, and overall Philip just didn't like how it was looking. So he moved on to another plan, which took about the same amount of time as this failed attempt.

Philip changed to a simpler design, one that he found airy and knew would look great in the white matted white frame that he'd purchased, as well as on any of our wall colors. He went with the colors from our wedding invitations, yellow and grey, because it was definitely a reminder of our beautiful backyard wedding. 

He started similarly to the owl print, by getting the text onto the paper he wanted to use. That's one thing I really appreciate about the artwork he made, he could have easily printed it off the computer, but he hand wrote everything. 

Philip wrote our vows in a heart shape, the left side with my vows and the right side his.  (In the background you can see how he made a light table out of a reading lamp propped up under our glass desk.)
Philip wrote our vows in a heart shape (you can kind of see that above), the words were written in yellow, with the verbs in grey. The left hand side are my vows to him, and the right side are his. Then at the bottom he included our wedding date, August 6, 2011. I have wanted to have our vows framed somewhere in our house for a while, I like the idea of seeing our promises each day and using them as accountability and reminders of what we want for our marriage. 

Philip then cut them out, into two separate heart halves, and glued it on to yellow construction paper, in order to make it a little bit more 3D, similar to the effect that was meant with the owl art. 

All done, just needed to cut the mat.
After finishing up, Philip cut the mat to make room for the artwork inside. I love how it has a bit of a monochromatic and airy look, will definitely go with any kind of paint color or decor that we have in the room it hangs in. 

We opened our gifts first thing in the morning, which is why I'm looking a little sleepy and wearing an always flattering Seattle Mariners t-shirt.
I was so shocked to open it and love it like crazy. I can't wait to hang it up in our bedroom with some wedding photos. I still can't believe we've already been married for almost 2 years, it definitely doesn't seem that long! 

My favourite part of making crafts for each other was probably the fact that none of our rooms have doors right now, so we worked in opposite corners of the house with Christmas music blasting so we couldn't accidentally hear any hints. 

Anyone else make a creative Christmas gift or get surprised by their spouse? Almost done with Christmas posts a week into 2013, on Monday I'll share one other quick anyone-can-do craft that might help with cleaning up your Christmas decorations a bit, and then on to 2013! Make sure to vote in this weeks poll on the Facebook page and on Tuesday you'll hear about our resolutions! Have a great weekend!

Thursday, 3 January 2013

DIY Gift: Date Jar

As hinted in yesterday's post, we added a little DIY flavor to our Christmas gifts to each other this year. My homemade gift for Philip was the Pinterest-famous Date Jar. The first place I saw them was here


Life in the Green House Date Jar Inspiration
This was a pretty elementary craft, finished in a couple of hours, minus the time I had spent thinking up date ideas throughout the week before which was more scattered and not really dedicated time. 

I started out getting a jar from my mom's house. I cut out a piece of paper for the top to cover the expiry date (popsicle sticks with words on them don't expire - fancy that). On the paper I wrote what the different colored sticks would mean. 

After shopping with the intention of buying popsicle sticks and paint, I could only find already colored popsicle sticks which actually saved a lot of time. I used blue for Winter dates, yellow for Summer, and green for anytime. Then I painted the tips of any dates that cost money with white. This way when we go to pick we can pick something more specific to what we're wanting to do that day. 

Date Night Examples:


  • Movie Night: His Choice
  • Go to a restaurant we've never been to
  • Make a craft together
  • Make dinner together
  • Pick out a 5 dollar item each from Superstore to make a surprise date night
  • Build a snowman


Philip appreciated the thought that went into it, and it was fun and easy to make. It will hopefully also save us some time every time we want to have a date night and don't have any ideas. 


I have some pictures of it, but for some reason my iPhone decided to crash today...not too sure what will happen with that. Hopefully we can get it up and running tonight and it doesn't cost a fortune. I will add some real pictures tomorrow hopefully, but until then, this I-can't-believe-it's-not-a-photograph illustration should tide you over.


Update: Phone randomly fixed itself, so here's some photos!


Finished date jar!


60 popsicle stick date ideas!


Also be sure to head to the Facebook page and answer our weekly poll! We want to hear all about your New Years Resolutions or plans for 2013, and we'll share ours as well next week. 

Friday, 14 December 2012

DIY Paintings (without any paint!)


Last week in your Friday Phil, I outlined some strategy to picking artwork from my in-laws, with the caveat that we had never really put it to the test. The reason was, for most of the significant pieces of art we've acquired, we made it ourselves. I promised then to let you in on our secret of how we do that.

Now, let's be clear: I love colour and art, but am by no means an expert on painting or photography. I've heard the names Ansel Adams and Annie Liebovitz. I could recognize Whistler's Mother and that one with the melted clocks by Salvador Dali. But I am by no means an art critic or could even consider myself an aficionado.

(Side 
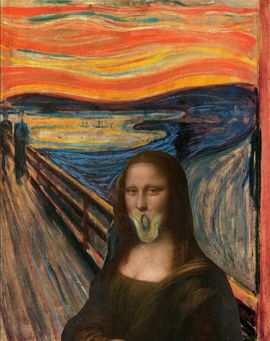
note: have painters ever considered doing mash-ups like musicians sometimes do? 
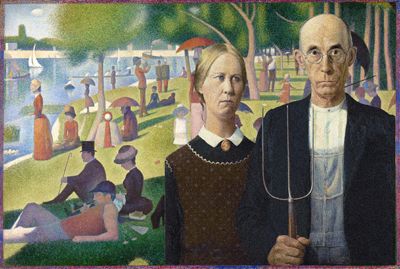
If so, how do we not have the "Screaming Mona" or "An American Gothic in Paris"? Well, we do now! And somewhere an art historian is convulsing uncontrollably.)
Are these the only painting inspired by Linkin Park and Jay-Z's Collision Course mashup album? If so, you're welcome, art world!

But I love colour, I love art in so many forms, and I love being creative, and here's a few ways you can achieve interesting results that fit your space without breaking the bank.

Idea #1: Actually get good at painting

Watch a lot of Bob Ross. Practice with The Joy of Painting (maybe even buy the 10-DVD set!). Buy canvasses in bulk to save on per-unit costs and practice your happy little trees. (Bonus points if you get into it and grow a majestic afro.) As a result, you'll have gained a really cool new skill AND you'll have made a new friend, may he rest in peace.

Idea #2: Find somebody who's cheap and good

Commission a painting from a struggling artist or a friend who dabbles. This way allows you less control over the creative process, so make sure you have a solid discussion at the outset in which you lay out your requirements. The result is a little less DIY, but you'll get a real original piece of art and have supported the local economy and/or a friend in need.

Idea #3: Photoshop 'til you drop

The following is the strategy we promised, which we've used twice to results we're very happy with:

Step 1: Go through your art store and find an theme you like. Maybe it's a picture of a carousel, maybe it's a famous landmark in your hometown, or maybe it's morning light filtering through a hazy forest glen. 

Step 2: Search the Stock.Xchng or EveryStockPhoto for a free or cheap stock photo that suits the theme you're looking for. Pay close attention to your rights as a user of the photo, particularly if you are considering selling your work.

(Alternative to Step 1 and 2: Skip this whole bit and find a photo you've taken in the past that you love.)

Step 3: This step requires Photoshop or a comparable product, which could easily be the most expensive part of the whole process if you need to buy it. (I've seen great results for free out of GIMP, but have never used it myself.)  
Import the photo, resizing it so it's at least 300dpi and the dimensions you want for your final piece. Then, save this as a separate file to preserve your original in its pristine, untouched state. (Why do I recommend this so strongly? I couldn't provide you with the step by step instructions of what I did both times we used this process because I didn't follow this advice myself.)

Step 4: Copy the base layer and start experimenting! 
Want a painted look? Try working with the Watercolor and/or Paint Daubs. 
Want an ink drawing? There's a filter for that too.
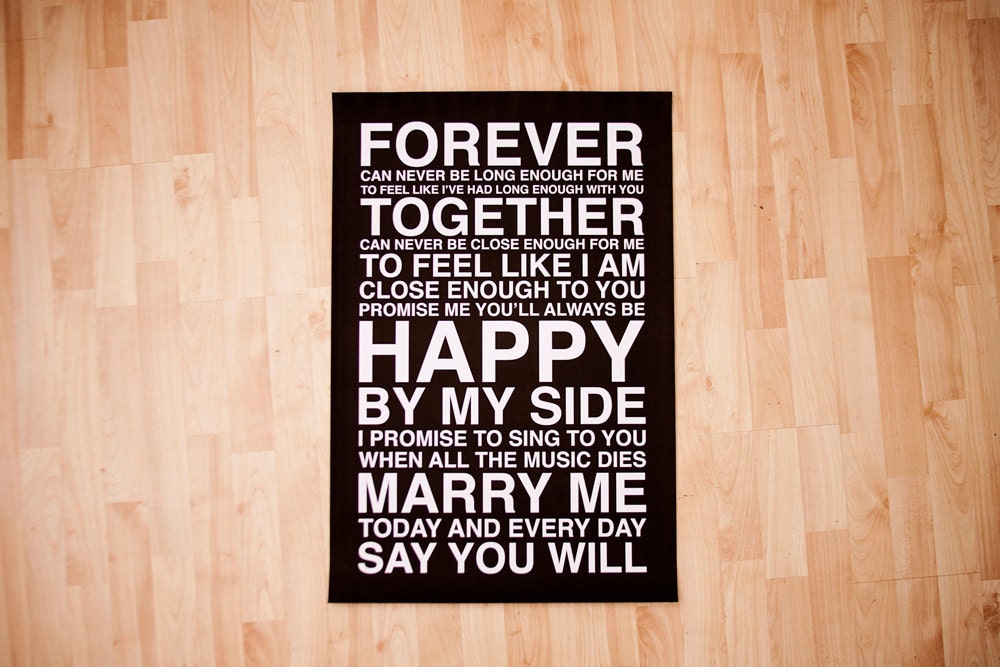
Want to keep the photographic look, but isolate a specific colour? Photoshop's Magic Wand or Magnetic Lasso Tools are great for that. Or (spoiler alert) do what we did in the bedroom, and take a black and white photo and add colours to it that suit your room!
Be warned though; most filters don't immediately produce distinctive, original results; experiment with different foreground and background colours until you get results you like.

If you're really brave, create a new layer above your artwork, select an appropriately sized/shaped brush, and try to recreate the photo. It's a little like Paint By Numbers meets The Internet. (If you try this, I recommend creating a new layer for every colour you use.)

Step 5: Once you're happy with the look, find someone who will print "photos" on gallery-wrapped or framed canvas. Groupon used to sell coupons for a bunch of these kind of printers, but for our money, we always used Costco Photo because they were very competitively priced, offer a 36"x24" size that we wanted (most don't go that big), and we can pick it up at our local store 10 minutes away.

Show and Tell

Now, this is useless unless we show you what we did. Unfortunately we don't have the original photos we used, nor a snapshot of the "paintings" in progress; at the same time, the process of experimenting with what looks good doesn't always yield linear progress conducive to step-by-step instructions. That said, here are the final products"

Our first fake-painting using this method.

For the first piece, we were inspired by the aforementioned idea of dark tree trunks in a vivid forest. I was hoping for more of a Monet-ish painted look (i.e. a natural landscape or image but not aiming for photographic realism) so I used the Paint Daubs filter a bit, and because we wanted it to fit in our living room, I worked in the espresso browns of our living room furniture as well as the blue of our condo's living room's feature wall (now the darker blue in our office). The result hung in our dining room at our condo; we haven't decided where it'll end up in Grandpa Joe's House.

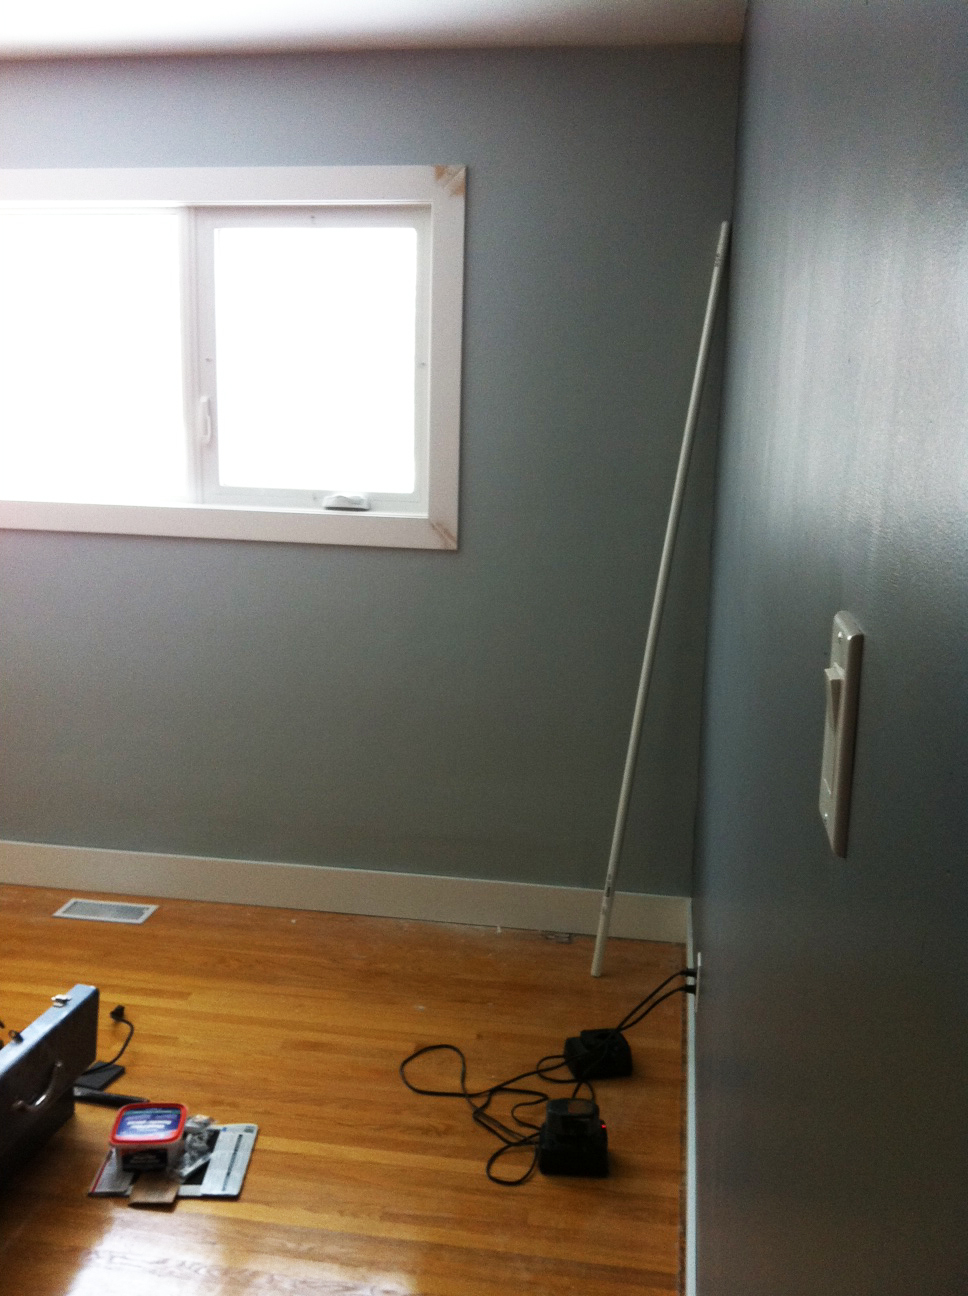
Our second, calmer fake-painting. (Actually, more of a faux-tograph perhaps?)

The second piece we did we wanted to have a more calming influence. Inspired by a photo of the aforementioned forest glen, we filtered the photo (that was originally black and white) less heavily. I added in extra mist, but apart from that, the most I did to adjust the photo was add some blurring (as much to hide pixellation of a smaller photo as anything) and added the colour to the grass and tree. The finished result will hung over the espresso fireplace in our bedroom in the condo, and when we picture that in our house, we still like that idea.

One Way to take it to a whole. 'Nother. Level.

As a final note, if there's something a gallery-wrapped canvas print lacks, it's--no, not a soul, although some "real artists" might argue that point (and who am I to refute them?). It's texture. But I saw a Thomas Kinkade 60 Minutes feature (that you can watch online) once that showed the Painter of Light in a whole new, well, light. His was a very commercial enterprise that offended many art critics who felt that art should be about creativity, not formulaic cash cow exploitation, while Kinkade's defenders used a variation of the "subjective nature of taste" argument to justify the value of his endlessly-reproduced work; I'll let you decide where you stand on that.

But one thing I saw that I've been reminded of recently is that he had a crew of people who would take prints of his work and add spots of real paint to various sections (maybe highlight the snowcapped trees with some real white paint) to add texture and increase the value of the works when sold.

Thinking about it now, why couldn't I do that to some of the prints I've made? Not to add to their monetary value per se, but to add texture and make it feel more "real." I could match some real paints to the colours in the print, grab a brush, and spread it on thick. I've stocked that idea away for a rainy day, but we'll be sure to let you know how it goes, for better or for disastrously worse!

How about you? Have you created a painting for your home and get any interesting (perhaps even Pinteresting) results?

Thursday, 6 December 2012

Caulkerspaniel

Ok, now that we've all laughed for five minutes about that amazing post title, wow I really out did myself with that one. I have one hour to write this post and keep up the 5-days-a-week streak, so I'm going to keep this short and sweet.

Last time we talked about our bedroom we had painted and installed trim, with tasks left like patching nail holes, priming, painting, and caulking. My parents helped us out with the trim as they had done their own last year, except they still haven't caulked theirs because they are scared of it.

At first I thought this fear was crazy, how hard can it be? One day while Philip was off at work I decided to give it a whirl. Got my little bowl of water, cut off the tip of the caulk, put it into the caulk gun (coolest non-deadly weapon ever), and I was ready to go. Lined it all up, started to pull the trigger...There was way more excess than expected. As I wiped it with a wet finger I was very quickly realizing the catastrophe occurring. I ran to get a wet rag, and with that, learned the trick to caulking successfully. Make a huge mess, then clean it up with a wet rag before it dries. Secrets to success people.

My first section of caulk, the rest looks a lot better...
but this gives you an idea.

I stopped when I got to the dark walls, fearing that I might mess it up big time and it'd be a lot less blended in. Philip finished it up on the weekend as he has a much steadier hand. However, we did encounter another obstacle. We were noticing that the paint was peeling off a lot when we wiped away the caulk, so we went back to Rona and bought some latex painters caulk instead of what we had been using previously. It worked a bit better, there was still some paint loss, but my mom came back and worked her cutting in magic and it was all better.

We got through it although some profanities were surely tossed around, and it wasn't altogether smooth, but we got it done.

Has anyone else caulked anything recently? Is it easier than I think?

Least favourite things about caulking:

  • It's sticky and weird when you get it on your hands
  • So messy - this kind of goes with the first one
  • I hate how it keeps coming out of the tube even when you're not pulling the trigger so it's just constantly coming out and you have to put it on something when you need to put it down to smooth
Caulk stream going strong even when I'm not using it. 

It does make the job look a lot more finished, and I'm glad we did it even though it might have been one of my least favourite tasks so far. One thing I've been learning through this whole thing is that we get hung up on one task, hate it, notice every flaw, then move on to the next and completely forget about it and we don't even notice the work we did on it anymore. It's like a woman in labour, forgetting that horrible pain and having 3 more children. 

Wednesday, 28 November 2012

6th Time Is the Charm

Disclaimer: Be prepared for a really long post about wire shelving that is a bit low on pictures and a lot high on frustration and disappointment - just to get you through it, I promise it has a semi-happy ending!

Number 1

This Sunday we went to Home Depot with the purpose of buying some closet shelving for our new and improved Master Bedroom. Little did we know the adventure that was about to unfold.


You should first understand the closet organization shopping experience at a home improvement store, it involves a lot of signs, a lot of directions, and a lot of calculators. 

When we got to Home Depot for the first time (the title is a bit of a spoiler here), we had decided to go with the white wire mesh basic shelving and had begun loading it into our cart. Closet shelving seemed easy to us at the time and we knew basically what we wanted so just went for it. Our closet is 8' wide and about 2' deep, so our original thought was an 8' long wardrobe shelf at the top, a 4' long wardrobe shelf below to allow for some double hanging and some long hanging (I have a dress addiction), and we had also planned to put a narrow shelf at the top for additional storage. 

We started out loading up the shelves, and then we read some signs. They talked of C clips, Back Clips, End Clips, Shelf Supports, etc. Each of which had a different requirement such as use at the ends as well as every 36 inches, use every 40 inches as well as 2 inches from each end, use in between shelves if they will be holding twenty kittens while cooking cornish game hens and singing the theme song to "The Jetsons" - this is almost not an exaggeration. Every single different component was to be used at a different measurement, and came in a bag with a different number that didn't make sense. For example, shelf brackets only come in a bag of one bracket each, while c clips, which you only need a couple of, came in a bag of 20. Very puzzling. 


A list of the necessary hardware needed to mount our shelves.
Math was my favourite subject in high school (can't even explain that one - my favourite food is also broccoli...I'm unique), but somehow in a high stress home improvement nightmare, math can really cause me to become overwhelmed.

So anyway, we got our cart all loaded up and were ready to get out of there, when an employee at Home Depot stepped in to try and upsell us on the special shelves that you can add cool accessories to. We were pretty sure what we wanted, but being nice we didn't shut him down early enough which meant that we were still there when a nice couple walked by and awkwardly announced that Canadian Tire had a better deal and we should go there instead. The employee sort of awkwardly joked it off and we told him we'd shop around a little, so we unloaded our cart and moved on. 

Number 2

Off to Canadian Tire! We very quickly realized that they didn't have what we needed at all at Canadian Tire - don't know what that couple was thinking. One thing we did see there were some pre-made boxes of closets for certain sizes and so that added another factor into the equation - did we want to do it piece meal or buy a box that is already completed with all the hardware we need. More math! What was cheaper??

Number 3

Before heading home for the Grey Cup we figured we had time to stop at Rona just to make our home improvement Transcona tour complete. They had almost everything we needed but were missing one of the sizes of shelves that we wanted. We grabbed some free popcorn and headed back to Home Depot.

Number 4

We snuck the back way up the closet aisle to avoid our new "in training" friend John so that we could get in and out quickly and watch Toronto beat Calgary. We just wanted to see the price on the prepackaged closet kits there so that we could give it some more thought. The boxes cost around $200 so it was very close to the same price as the piece meal way of doing it. So confusing! I was very tempted, but the box didn't have the same amount of shelving we wanted and came with some components we didn't really need, like shoe shelves (which we keep in our front closet for the most part). 

Number 5

Yesterday, we went to Home Depot to get this all over and done with. They didn't have enough hardware (I believe the shelf supports were what they didn't have enough of) at the Regent Home Depot so we were headed to Polo Park. We got there and finally decided what we all wanted - after we got in a bit of a dispute and I had to return to the carpet section for some soothing once again. 

After all of this we decided it made sense to not put an additional shelf way above for extra storage as it would be awkward to get at or put anything sizable on, and we have plenty of storage in our house. It's hard to tell right now because we have stuff everywhere, but we will have a lot more room than we did in our condo once some more of our rooms are usable and things are put away. 

During this trip to Home Depot we finally calculated the difference in price between the box of prepackaged closet and the individually purchased components. With deciding against the top shelf, we would be saving over one hundred dollars and getting the same amount of shelving so it made a lot more sense for us. Definitely won't judge anyone who buys the box though, this experience made me hate closets forever.

We were about to leave when we realized that we weren't so sure we could fit the 8' length in our car. I feel like I can hear your audible groan through the computer as I write this. Somehow we didn't think of it before hand. We decided to go home and eat supper and then head out again with my father-in-law's truck.

Number 6

After filling up on some delicious tacos, we headed to the in-laws to pick up the truck. Little did we know there would be another obstacle, there is a storage box and hitch in the back of his truck so it wouldn't fit in there either. We measured our car and realized we could fit it in our Torrent if we put it in diagonally, so I stayed there and Philip headed out once again. 

A couple hours later and our closet shopping experience was complete, it only took 6 trips and a lot of angry discussions and tears, but we finally have shelves. Now just to install them without any issues. Knock on wood!

It wasn't nearly as easy as this guy makes it sound:


Has anyone else installed wire shelving in a closet recently? Any tips for us? Now just to get through this week, finish our bedrooms, and move in! The caulking is the death of me so wish me luck as I wrap that up and hopefully share about it soon. All of this work is putting us majorly behind on our Christmas shopping, fill in the poll and let us know how prepared you are for the upcoming holiday season!

Tuesday, 27 November 2012

Trimming the Tree...erm Walls

We haven't put our tree up yet, but we did trim a couple of other things this weekend...the walls in our Master Bedroom and Office are now fully painted and beautifully adorned with white trim. 

Our condo had oak trim, and this new house had some kind of wood trim as well and so I was definitely ready for some refreshing white trim. It also made our paint colours look way better! 

We went to Home Depot on Wednesday night last week and purchased it, making sure to get it a couple days in advance of installation in order to allow it to acclimate as recommended. My dad came on Friday to do the installation as he has the tools such as a mitre saw and brad nailer. 

First up was measuring all the casings and baseboards, and making sure that we allowed enough width to cover any and all flaws that were hidden behind the previous trim. That made our decision for us because our previous trim was 4" wide and the options at Home Depot were 3 ½" and 5 ½" - 5 ½" it is! We were able to get away with 3 ½" window/door casings though.

My mom manned the mitre saw while my dad measured (without his glasses) and I ran in between them. I am a little low on pictures because neither of them wanted to be photographed in their painting clothes - have to keep up the image after all. 

We did the casings first, although we ran out of material partway through and had to go back for more (not sure how that happened - measure twice, cut once!). After they were all done we did the baseboards which were finished a lot faster! 


The windows look even bigger and brighter now! 

Casings done in the office.

Drooling over my white trim.
Master Bedroom getting trimmed out. 

Mm baseboards!

It already looks much more finished, even baseboards in the closet makes a big difference!

This might be my favourite, looks so sharp against the Silver Streak walls.
Is anyone else drooling over this as much as I am? I realize these photos are about the least exciting pictures in the world, but to me they are pure heaven. I am so excited. 

Next up: sand, putty, paint, and caulk these babies. Then we can move in! 

Check out our to-do list, we're pretty close to finishing our Fall section! I'll do a review of it at the end of the month and then we can move on to Winter and the Christmas shopping that needs to happen. 

Friday, 23 November 2012

5 Tips for Surviving The NeverEnding Story that is Painting

As Philip helped me out in writing yesterday's post, I thought I'd catch up on my four posts a week by filling in today.

In some ways this prepping and painting saga has reminded me of the movie The NeverEnding Story. It not only seemed to drag on forever and I was never sure if we'd finish, but it kind of terrified me. 


I feel like this is a memory from my childhood that has scarred me for life - as has this painting experience. The name of this character, Falkor the Love Dragon
doesn't really seem to be fitting in my mind.
I spent days and days prepping the ceiling and walls for painting, attempting to make the plaster walls as straight as drywall to no avail. It still doesn't look perfect, but we're okay with it for now. Once the light fixture is replaced (and we don't just have bare lightbulbs shining right on it creating terrible shadows) we're hoping things improve. You can read more about our experience with patching the ceiling in yesterday's post.

But things are looking up, people! Instead of just undoing what's already in place, we are now moving forward: we have colour on the walls, things are feeling a lot fresher, and after three months of living here it is beginning to feel a little more like home. And so we offer some tips for painting that you may or may not find helpful.

Tip #1: Practice, practice, practice your edging (or have a mom who's great at it already!)
Yesterday began at 8 am when my mom showed up to help me with painting. She's amazing at edging and doesn't need tape which is a huge time-saver. Katie Bower loves her some Frog Tape, and we've never tried it ourselves, but our experiences with taping haven't exactly been known for their speed or their ultimate quality. Edging is an art, and maybe one day we'll put together a how-to post where we pick my mom's brain; for now, know that if you can get good at cutting-in without tape, you're a big step ahead in the painting department.

Tip #2: Don't let good paint go to waste.
We went ahead with the plan to reuse leftover paint from the condo to both save us some money and prevent it from going to waste. Because we didn't have enough paint to do a full room in any of the colours we had on hand, we tried to choose complimentary colours and thus both rooms ended up with a two-tone look (spoiler alert).  At some point if we don't fall in love with the combinations of colours there might be some repainting going on, but for now it certainly looks okay. 

When my mom got here, we started out by sanding the air conditioning circles one more time and priming them. Since we had to wait for those to dry, we went ahead and started painting in the office. I had painted that ceiling on Wednesday with the help of a friend, and so we were ready to get going with the walls. Philip chose to use Benjamin Moore's West Coast (previously in our condo living room as a feature wall) as well as their Blue Stream (previously in our condo guest bathroom). It's interesting seeing this pair of very familiar colours in a totally new room, and right next to each other where before they were separated.

I took a few progress photos but there isn't much to see so I'm going to go ahead and skip right to the completed paint job. There are a couple of angles shown here, and next week as we put the furniture in and get the trim up over the weekend there will be a lot more completed photos to be seen!

This is the view you see when you walk into the room. Blue Stream covers the window wall and closet wall.

To the left of the Blue Stream window wall, the colour transitions to the darker West Coast.

This is the view of the closet corner, showing the transition from Blue Stream to the West Coast that covers the hallway door wall.

Next, we started work on the master bedroom. First up was the ceiling, which leads us to...

Tip #3: When painting ceilings, use a broom handle as a roller extension, but use a solid wooden broom handle.
My mom suggested attaching a broom handle to the roller so that I wouldn't have to stand on a stool and move it all the time, seemed like a great idea! I started with a plastic blue broom handle. It seemed a little bit flexible but worked pretty well... for one row across the ceiling, upon which it promptly broke, allowing the paint-soaked roller to fall from the heavens leaving my beautiful Mike Cameron Seattle Mariners t-shirt with a painted shoulder (might need to buy a new one!). 

So I tried again, this time with a metal broom handle. I got almost the whole ceiling done but then --SNAP-- it happened again! Oh boy. More paint on my head. More paint on the floor. More time spent cleaning up. So I'll go ahead and recommend you try with a wooden broom handle, or else just suck it up and do it with a step stool, as I did for the second coat. Or just tarp the floor like crazy, have backup t-shirts on hand and get the Herbal Essences variation that's good at getting latex paints out of hair ("More volume! Beautiful shine! Less house paint!").

After the ceiling was dry we painted the rest of the room, using Benjamin Moore again, in Smoke and Silver Streak. On this one, we were pretty uncertain how to proceed, so let's head straight into...

Tip #4: Decide on paint colours and don't second-guess yourself.
Based on the inspiration picture we posted two-and-a-half weeks ago, we were definitely going for a light, textured, layered, airy room with plenty of visual interest. Silver Streak is a darker shade (a "bold, saturated" colour "that brings spaces to life for those looking to illuminate their world with pure, extraordinary colour," according to Benny M!). Not exactly light and airy. So I phoned Philip at work to get his opinion. I'll let him describe what happened next, but know that this is his interpretation and it wasn't exactly like this:
Cass called me at work. She was agonizing over using Silver Streak in the bedroom. She wanted to know my opinion. I said I thought it would look okay. She said she didn't think so, could we get another can of the Smoke? I said, sure, if that will make you happy. She said no, we can't do that. We're going with the Silver Streak. I said no, go ahead, get the extra can and paint the room Smoke. But somehow--in a phone call that started with her complaining about the Silver Streak and asking if we could get more Smoke--she'd convinced herself that the Silver Streak was the way to go. Women.
Okay, he didn't add that last word, but he might as well have. And in my defense, saying that I could go get more Smoke if it made me happy wasn't exactly the same as saying "I like Smoke better than Silver Streak, please paint it that!"

Long story short, we're almost done, the first coat of Silver Streak is on the walls, but we have to do a second coat over the weekend before we put up the trim.

Silver Streak covers the Master Bedroom walls by the hallway door and the closet.

Smoke was the choice for the Master Bedroom's window wall and the wall to its left.

I cannot wait to see the white trim go up, and start putting some furniture into these rooms that have been storage rooms up until now! Which reminds me...

Tip #5: Don't tell Philip "I can't wait until the rooms are furnished."
...because he will start laughing, thinking you meant to say "finished" and had just let slip with a very weird accent. Then he will start trying that accent out himself: "Err carrn't wairt urntil the rooms arrre firnirshed..." And you will be laughing because he's really just making fun of himself... maybe you had to be there.

But yeah, the most exciting thing will be sleeping on a mattress that is not on the floor for the first time in months! It will also signify the third room we've slept in in this house in three months. Ay caramba.

You may have also noticed that we've extended the poll for over the weekend, we will write about the results on Monday after those Americans come back from their festivities and we're done a bit more around this place. 

Anyone else had a week they could barely get through? All I know is I'm lying in bed right now writing this (it's actually Thursday - woah this is a Back to the Future moment) with feet so sore I can barely walk. I am so ready to move into our new bedroom and put this project behind us. Anyone done any painting lately? Have terrible childhood memories of The NeverEnding Story? Maybe that's just me. (Philip had never seen it. He's also a little older so he's not quite as informed into what was cool when I was a kiddo.)