Showing posts with label Office. Show all posts

Thursday, 21 March 2013

Sanity Will Return

You might remember a long time ago, as in before Christmas, when we finished our master bedroom and office. They were beautiful! You may also have noticed that I said were

Fast forward a few months, and our bedroom has been high jacked by bathroom staging, and our office is where paperwork goes to die. 


Well, since our bathroom is on hold for the moment (due to the insulation in the ceiling needing work, and Winnipeg weather not being ideal for removal of insulation for a few days at  the moment).  I'm retackling these beautiful rooms we created. There are still some decor features we want to add to each, for example I want to make a headboard extension for our bed, hang some hooks, artwork, etc. in the Master Bedroom, but first we have to tackle all this clutter. A lot of the bathroom stuff in our bedroom can't be dealt with until we have a bathroom to put it in, but I can get started on the office. Here's how it looks now (I just took pictures in a circle around the room, moving right for each one, so this is basically a 360 degree view of our office). Excuse the photos, we still need to get a high quality camera - as in higher quality than our iPhone 4's, we don't have a window covering and it was pretty bright, and it's just crazy messy in there.:


The view straight ahead from the door. Here you see the area to the left of our desk,
as well as one end of our desk.


Moving right, you can see the other half of the desk. 

Directly to the right, is the closet which houses our filing cabinet. 


Next up is a console table we inherited from the condo. 


On the other side of the door, is the first of three bookshelves. 

And finally the last two bookshelves. 

It isn't a huge space, but I think we've planned the storage pretty well. Now we just have to get it clutter-free and organized!


Office Sanity Checklist...plus a few extras for aesthetic purposes that might happen down the line (run on sentence alert)

Yes we're list oriented...in case you didn't know.

Create Mail Center/Cass' Area

- Hang White Board  We completed this on Monday night with the help of 4 velcro command strips as you can see in the photo with the console table! P.S. I did this almost all by myself, Philip was there offering guidance but I was in charge. Woot Woot, pink toolbelt here I come.
- Hang Art Gallery
- New Console Table
- Mail/Card Area
- Craft Supplies
- Receipt Inbox

Desk

- Set Up Printer
- New Office Chair
- Hang Art
- Storage Solution for Philip's Drama paperwork, temporary papers

Closet

- Stain Closet Rod & Shelf
- Organize Games
- Organize Filing Cabinet
- Create Warranties Binder
- Gift Wrapping Supplies
- Paint Closet Door

Bookshelf

- Style Empty Shelves
- Go through books for potential garage sale

Other

- Sand, Prime, Paint Door & Rehang
- Window Covering

Some more things might spring up as we go, but this is my initial goal list as far as bringing our once beautified office back to a beautiful state.

Monday, 10 December 2012

Floor Solutions

After we'd finished caulking the trim, we took a step back and reassessed what needed to be done to make these rooms complete. When we removed the baseboard radiators, two small circular holes remained in the floor where the pipes ran. 

My dad had the idea to cut some oak doweling to fit the holes and fit it in to make it less noticeable. At some point we may need to replace the floor, or refinish it at least, but for now this just makes things more livable.


Pretty rotten still, but no more major hole.

We bought some oak doweling at Home Depot (something like this) for a couple of bucks, and cut a small disc off. We still have a lot of doweling left for the remaining rooms once we get to them. It definitely worked to plug the holes, but there was still a lot of rot around where the holes were. We puttied over the holes and a bit around where the rot was in order to try and match the colour of the floor a bit better (the rot was pretty blackened and a bit of an eye sore). Once the putty was dry, we sanded and did one more coat. It definitely still didn't match, but it looked less rotten. 


The wood putty recommended wearing a mask and safety glasses...seemed a bit like overkill,
but Philip is nothing without safety.

Finished puttying, definitely not a match but we're getting somewhere.

Since we were working on floors anyway, we also decided to tackle the darkened ridge all the way around both rooms. The previous homeowner (Grandpa Joe) had quarter round in addition to the baseboards, so his trim was quite a bit thicker than the new trim we installed. He had refinished the floor once before and our guess is that the trim wasn't removed when that happened, because the floor under the trim was a slightly different height, and a bit of a different texture because it wasn't refinished and nice and smooth. The rough texture it had also attracted a lot of dust making it really dark and gross. 


Dark border around the room, another idea we had was to stain the whole border of the room a mocha colour in order to just embrace what was already happening.


At some point we may need to add quarter round to our trim in order to cover it up a bit better, but for now we've come up with a temporary fix until we know if we need to replace the floors down the line or not (this will be revealed by whether or not we encounter floor gaps that are impossible to fill when we move some walls around). We sanded all the way around the room with a belt sander to smooth the surface. 


Sanding Sanding. Almost ready to have a dust free home after all of this. 


After that, we went around the room with a finishing product that gives the floor a bit of oak colour, and seals it at the same time. We just rubbed it on with a cloth (in this case an old pair of underwear which looked super disgusting at the end). 


These underwear provided a lot of laughs, if you ever want a day off work just say that you're sick and send this picture, no questions will be asked.

We ended up doing two coats in both rooms, and it's still a bit noticeable but definitely not the eye sore it started out being. As furniture gets added, and as the patched holes are below the window on both sides exactly where curtains will hang, it will definitely start to be more camouflaged. 


Before
After
Anyone else been tackling floor projects lately? Have any suggestions for us besides put a rug over those holes? Our room is definitely starting to look great! Another update, today when we got home from Ikea (for the 4th time - keep forgetting things!), our garage didn't open...need to investigate a bit more but hopefully it won't be too expensive a fix. Wish us luck! Tomorrow we'll provide poll results so get your vote in!

Thursday, 6 December 2012

Caulkerspaniel

Ok, now that we've all laughed for five minutes about that amazing post title, wow I really out did myself with that one. I have one hour to write this post and keep up the 5-days-a-week streak, so I'm going to keep this short and sweet.

Last time we talked about our bedroom we had painted and installed trim, with tasks left like patching nail holes, priming, painting, and caulking. My parents helped us out with the trim as they had done their own last year, except they still haven't caulked theirs because they are scared of it.

At first I thought this fear was crazy, how hard can it be? One day while Philip was off at work I decided to give it a whirl. Got my little bowl of water, cut off the tip of the caulk, put it into the caulk gun (coolest non-deadly weapon ever), and I was ready to go. Lined it all up, started to pull the trigger...There was way more excess than expected. As I wiped it with a wet finger I was very quickly realizing the catastrophe occurring. I ran to get a wet rag, and with that, learned the trick to caulking successfully. Make a huge mess, then clean it up with a wet rag before it dries. Secrets to success people.

My first section of caulk, the rest looks a lot better...
but this gives you an idea.

I stopped when I got to the dark walls, fearing that I might mess it up big time and it'd be a lot less blended in. Philip finished it up on the weekend as he has a much steadier hand. However, we did encounter another obstacle. We were noticing that the paint was peeling off a lot when we wiped away the caulk, so we went back to Rona and bought some latex painters caulk instead of what we had been using previously. It worked a bit better, there was still some paint loss, but my mom came back and worked her cutting in magic and it was all better.

We got through it although some profanities were surely tossed around, and it wasn't altogether smooth, but we got it done.

Has anyone else caulked anything recently? Is it easier than I think?

Least favourite things about caulking:

  • It's sticky and weird when you get it on your hands
  • So messy - this kind of goes with the first one
  • I hate how it keeps coming out of the tube even when you're not pulling the trigger so it's just constantly coming out and you have to put it on something when you need to put it down to smooth
Caulk stream going strong even when I'm not using it. 

It does make the job look a lot more finished, and I'm glad we did it even though it might have been one of my least favourite tasks so far. One thing I've been learning through this whole thing is that we get hung up on one task, hate it, notice every flaw, then move on to the next and completely forget about it and we don't even notice the work we did on it anymore. It's like a woman in labour, forgetting that horrible pain and having 3 more children. 

Monday, 3 December 2012

Coming This Winter to a Winnipeg-based Home Reno Blog Near You!

Well, with December having commenced this past weekend, our official To-Do list for Winter 2012-2013 has just begun, and this is what we have to look forward to until February. For your benefit, we've included some rationales for why these items have been included now during the coldest part of the year:

Plans Plans Plans

  • Design/quote bathroom
  • Design/quote kitchen
  • Design/quote deck
  • Design/quote basement
  • Design/quote upstairs ensuite/walk-in closet
  • Design/quote landscaping and outdoors
Why now? Because we want to be able to budget for some of these projects over the next few years. And because it's cold outside, and dreaming up cool ideas for the future warms the cockles of our hearts.

This diagram clearly fails to illustrate where exactly the "cockles" are.
This article disturbingly suggests that cockles refer to snails.
We're going to stop researching this right now.
  

Window Coverings

  • Quote blinds and curtains
  • Install blinds in master bedroom and living room
Why now? Because we hate wearing clothes indoors want more privacy and because we feel self-conscious using our Wii-based exercise games in front of our only TV in the house in the living room, for all the world to watch us out our big picture window.

This gives you an idea of what you might see if you looked in our living room window while we were exercising using our Wii-based exercise games. Except, instead of "cool workout clothes" picture "ratty sweat-soaked t-shirts" and instead of "attractively bronzed men" picture "pale out-of-shape newlyweds dry-heaving during jump squats."


Light Fixtures

  • Replace bedroom/hallway light fixtures
  • Replace living room light fixture
  • Replace dining area light fixture
Why now? Because IKEA just opened in our city and they have really cool lights. As well, our living room light fixture fell from the ceiling and nearly injured me more than a month ago (it was as dramatic as you imagine it) and, as of right now, we haven't done anything about it.

Garage Door Openers

  • Remove existing garage door openers
  • Install new garage door openers
  • Identify lighting solutions
Why now? Because Philip's dad says Sears has a sale on garage door openers in December. As for why that is, well, you'd have to ask Sears.

Interior Doors

  • Remove bedroom/bathroom doors
  • Paint
  • Rehang bedroom/bathroom doors


Why now? Because none of our bedrooms have doors on them right now. Which means  changing clothes when we have company over involves a complex system of full blindfolds, bedsheet curtains, and sombreros. Don't ask.

"Señor, please put that blindfold back on!" (Changing at our house involves everyone else dressing like a stereotypical Mexican bandito.)

Gut Upstairs Bathroom

  • Remove mould
  • Discard wall tiles
  • Discard bathtub
  • Discard flooring
  • Discard sink
  • Discard vanity/cabinets
  • Uninstall toilet
  • Replace window
Why now? Because right now we shower in the laundry room in the basement, and while the bathroom was once in style, that was when "Watergate" was something you might open to let a riverboat through.

Upstairs Bathroom

  • Install new shower/tub
  • Install new lighting
  • Install new flooring
  • Paint/tile
  • Re-install toilet
  • Install new cabinets
  • Install new sink
  • Install new mirror
  • Reconnect plumbing
Why now? Because unlike with the gutted basement, we don't intend to let the bathroom stay gutted for very long. And yes, we recognize having to go down to the laundry in the basement to have access to a hot shower is one of those classic #firstworldproblems, but it's at least a problem we have the power to correct.

As for more recent news...

Since we haven't updated you on the status of our bedroom reno since last Wednesday: Yesterday night we got a little bit overwhelmed because we're trying to get our bedrooms done (a project that has really unfolded to be a lot more complicated than we'd originally anticipated) so that we can make our living room a little less chaotic by this weekend when we have a Christmas party happening at our house. Wish us luck! As soon as we're done that it's full speed ahead with bathroom renovating - a little bit nervous about getting that all done on schedule, but we're doing our best! Started planning out yesterday some vanity choices and figuring out some obstacles ahead of time. 

Remember to fill out the poll today before we reveal results tomorrow (we've learned that comments and polls aren't working for iPad users, so get your computer out!). We'll be sharing a bit of our Christmas preparations as well tomorrow. 

What do you have in store for Winter? Anyone else crazy enough to tackle a major renovation while Christmas shopping and hosting holiday parties?

Tuesday, 27 November 2012

Trimming the Tree...erm Walls

We haven't put our tree up yet, but we did trim a couple of other things this weekend...the walls in our Master Bedroom and Office are now fully painted and beautifully adorned with white trim. 

Our condo had oak trim, and this new house had some kind of wood trim as well and so I was definitely ready for some refreshing white trim. It also made our paint colours look way better! 

We went to Home Depot on Wednesday night last week and purchased it, making sure to get it a couple days in advance of installation in order to allow it to acclimate as recommended. My dad came on Friday to do the installation as he has the tools such as a mitre saw and brad nailer. 

First up was measuring all the casings and baseboards, and making sure that we allowed enough width to cover any and all flaws that were hidden behind the previous trim. That made our decision for us because our previous trim was 4" wide and the options at Home Depot were 3 ½" and 5 ½" - 5 ½" it is! We were able to get away with 3 ½" window/door casings though.

My mom manned the mitre saw while my dad measured (without his glasses) and I ran in between them. I am a little low on pictures because neither of them wanted to be photographed in their painting clothes - have to keep up the image after all. 

We did the casings first, although we ran out of material partway through and had to go back for more (not sure how that happened - measure twice, cut once!). After they were all done we did the baseboards which were finished a lot faster! 


The windows look even bigger and brighter now! 

Casings done in the office.

Drooling over my white trim.
Master Bedroom getting trimmed out. 

Mm baseboards!

It already looks much more finished, even baseboards in the closet makes a big difference!

This might be my favourite, looks so sharp against the Silver Streak walls.
Is anyone else drooling over this as much as I am? I realize these photos are about the least exciting pictures in the world, but to me they are pure heaven. I am so excited. 

Next up: sand, putty, paint, and caulk these babies. Then we can move in! 

Check out our to-do list, we're pretty close to finishing our Fall section! I'll do a review of it at the end of the month and then we can move on to Winter and the Christmas shopping that needs to happen. 

Friday, 23 November 2012

5 Tips for Surviving The NeverEnding Story that is Painting

As Philip helped me out in writing yesterday's post, I thought I'd catch up on my four posts a week by filling in today.

In some ways this prepping and painting saga has reminded me of the movie The NeverEnding Story. It not only seemed to drag on forever and I was never sure if we'd finish, but it kind of terrified me. 


I feel like this is a memory from my childhood that has scarred me for life - as has this painting experience. The name of this character, Falkor the Love Dragon
doesn't really seem to be fitting in my mind.
I spent days and days prepping the ceiling and walls for painting, attempting to make the plaster walls as straight as drywall to no avail. It still doesn't look perfect, but we're okay with it for now. Once the light fixture is replaced (and we don't just have bare lightbulbs shining right on it creating terrible shadows) we're hoping things improve. You can read more about our experience with patching the ceiling in yesterday's post.

But things are looking up, people! Instead of just undoing what's already in place, we are now moving forward: we have colour on the walls, things are feeling a lot fresher, and after three months of living here it is beginning to feel a little more like home. And so we offer some tips for painting that you may or may not find helpful.

Tip #1: Practice, practice, practice your edging (or have a mom who's great at it already!)
Yesterday began at 8 am when my mom showed up to help me with painting. She's amazing at edging and doesn't need tape which is a huge time-saver. Katie Bower loves her some Frog Tape, and we've never tried it ourselves, but our experiences with taping haven't exactly been known for their speed or their ultimate quality. Edging is an art, and maybe one day we'll put together a how-to post where we pick my mom's brain; for now, know that if you can get good at cutting-in without tape, you're a big step ahead in the painting department.

Tip #2: Don't let good paint go to waste.
We went ahead with the plan to reuse leftover paint from the condo to both save us some money and prevent it from going to waste. Because we didn't have enough paint to do a full room in any of the colours we had on hand, we tried to choose complimentary colours and thus both rooms ended up with a two-tone look (spoiler alert).  At some point if we don't fall in love with the combinations of colours there might be some repainting going on, but for now it certainly looks okay. 

When my mom got here, we started out by sanding the air conditioning circles one more time and priming them. Since we had to wait for those to dry, we went ahead and started painting in the office. I had painted that ceiling on Wednesday with the help of a friend, and so we were ready to get going with the walls. Philip chose to use Benjamin Moore's West Coast (previously in our condo living room as a feature wall) as well as their Blue Stream (previously in our condo guest bathroom). It's interesting seeing this pair of very familiar colours in a totally new room, and right next to each other where before they were separated.

I took a few progress photos but there isn't much to see so I'm going to go ahead and skip right to the completed paint job. There are a couple of angles shown here, and next week as we put the furniture in and get the trim up over the weekend there will be a lot more completed photos to be seen!

This is the view you see when you walk into the room. Blue Stream covers the window wall and closet wall.

To the left of the Blue Stream window wall, the colour transitions to the darker West Coast.

This is the view of the closet corner, showing the transition from Blue Stream to the West Coast that covers the hallway door wall.

Next, we started work on the master bedroom. First up was the ceiling, which leads us to...

Tip #3: When painting ceilings, use a broom handle as a roller extension, but use a solid wooden broom handle.
My mom suggested attaching a broom handle to the roller so that I wouldn't have to stand on a stool and move it all the time, seemed like a great idea! I started with a plastic blue broom handle. It seemed a little bit flexible but worked pretty well... for one row across the ceiling, upon which it promptly broke, allowing the paint-soaked roller to fall from the heavens leaving my beautiful Mike Cameron Seattle Mariners t-shirt with a painted shoulder (might need to buy a new one!). 

So I tried again, this time with a metal broom handle. I got almost the whole ceiling done but then --SNAP-- it happened again! Oh boy. More paint on my head. More paint on the floor. More time spent cleaning up. So I'll go ahead and recommend you try with a wooden broom handle, or else just suck it up and do it with a step stool, as I did for the second coat. Or just tarp the floor like crazy, have backup t-shirts on hand and get the Herbal Essences variation that's good at getting latex paints out of hair ("More volume! Beautiful shine! Less house paint!").

After the ceiling was dry we painted the rest of the room, using Benjamin Moore again, in Smoke and Silver Streak. On this one, we were pretty uncertain how to proceed, so let's head straight into...

Tip #4: Decide on paint colours and don't second-guess yourself.
Based on the inspiration picture we posted two-and-a-half weeks ago, we were definitely going for a light, textured, layered, airy room with plenty of visual interest. Silver Streak is a darker shade (a "bold, saturated" colour "that brings spaces to life for those looking to illuminate their world with pure, extraordinary colour," according to Benny M!). Not exactly light and airy. So I phoned Philip at work to get his opinion. I'll let him describe what happened next, but know that this is his interpretation and it wasn't exactly like this:
Cass called me at work. She was agonizing over using Silver Streak in the bedroom. She wanted to know my opinion. I said I thought it would look okay. She said she didn't think so, could we get another can of the Smoke? I said, sure, if that will make you happy. She said no, we can't do that. We're going with the Silver Streak. I said no, go ahead, get the extra can and paint the room Smoke. But somehow--in a phone call that started with her complaining about the Silver Streak and asking if we could get more Smoke--she'd convinced herself that the Silver Streak was the way to go. Women.
Okay, he didn't add that last word, but he might as well have. And in my defense, saying that I could go get more Smoke if it made me happy wasn't exactly the same as saying "I like Smoke better than Silver Streak, please paint it that!"

Long story short, we're almost done, the first coat of Silver Streak is on the walls, but we have to do a second coat over the weekend before we put up the trim.

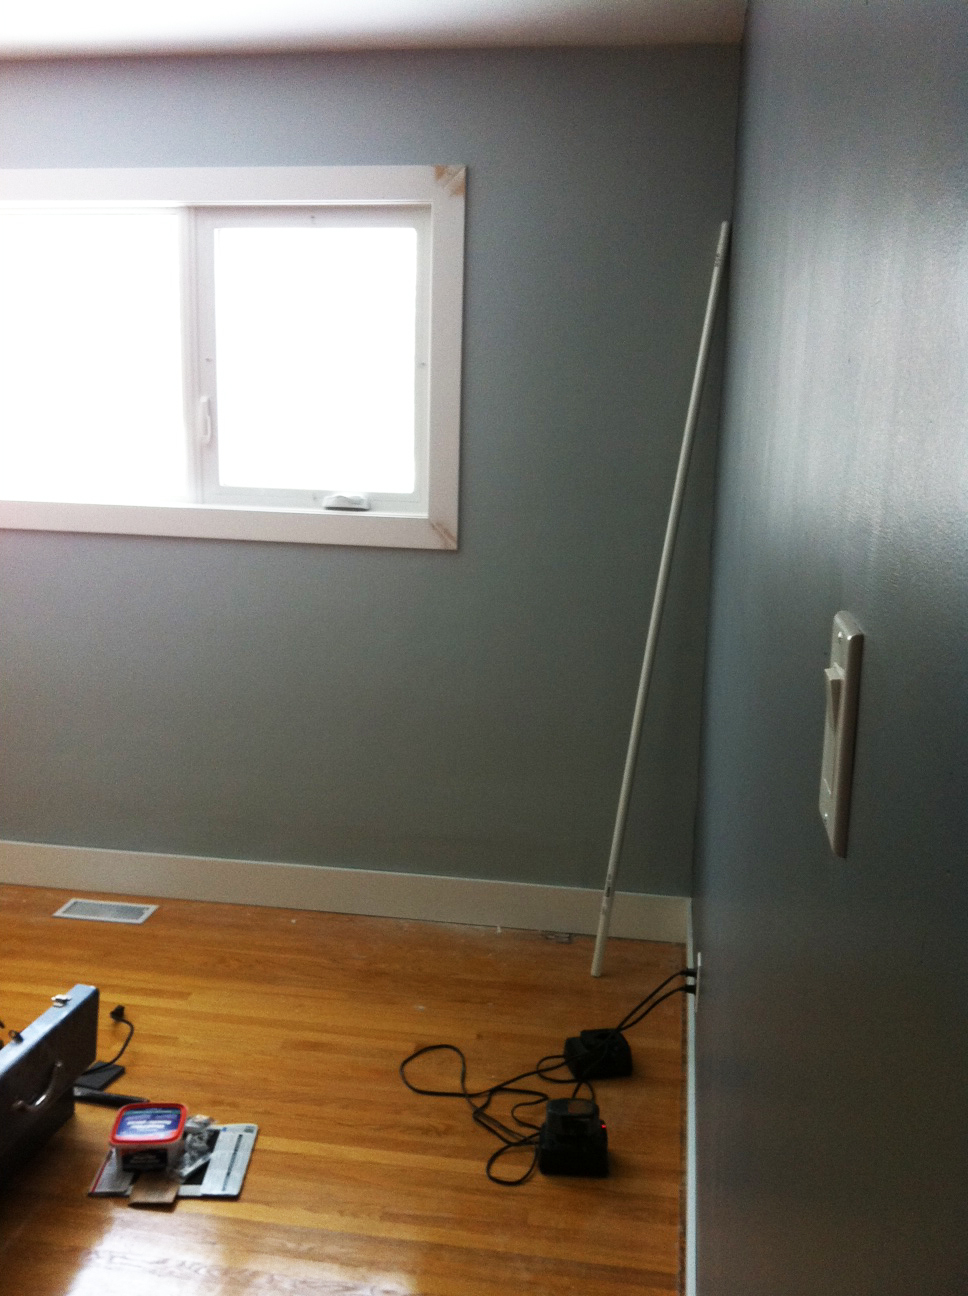
Silver Streak covers the Master Bedroom walls by the hallway door and the closet.

Smoke was the choice for the Master Bedroom's window wall and the wall to its left.

I cannot wait to see the white trim go up, and start putting some furniture into these rooms that have been storage rooms up until now! Which reminds me...

Tip #5: Don't tell Philip "I can't wait until the rooms are furnished."
...because he will start laughing, thinking you meant to say "finished" and had just let slip with a very weird accent. Then he will start trying that accent out himself: "Err carrn't wairt urntil the rooms arrre firnirshed..." And you will be laughing because he's really just making fun of himself... maybe you had to be there.

But yeah, the most exciting thing will be sleeping on a mattress that is not on the floor for the first time in months! It will also signify the third room we've slept in in this house in three months. Ay caramba.

You may have also noticed that we've extended the poll for over the weekend, we will write about the results on Monday after those Americans come back from their festivities and we're done a bit more around this place. 

Anyone else had a week they could barely get through? All I know is I'm lying in bed right now writing this (it's actually Thursday - woah this is a Back to the Future moment) with feet so sore I can barely walk. I am so ready to move into our new bedroom and put this project behind us. Anyone done any painting lately? Have terrible childhood memories of The NeverEnding Story? Maybe that's just me. (Philip had never seen it. He's also a little older so he's not quite as informed into what was cool when I was a kiddo.)

Thursday, 22 November 2012

Discovering the Untold Joys of Patching a Ceiling


Philip here. First off, sorry about the delay in getting this post up. Cass was working hard all day with her Mom painting, so it was up to me to get it done and, boy, I have a newfound respect for bloggers!

Also, no, it's not Friday yet, but Cass is up to her eyeballs in paint (metaphorically speaking), so it fell to me to share Part 2 of our Patching adventure. Unlike LOST, today's post doesn't depend on you having seen any previous installment. (But like LOST, a working knowledge of the Valenzetti equation will open up a whole new level of meaning to this post.)

Without further ado, on to the patching of ceiling:

To give you an idea of our predicament, we had ducting running to vents in the ceiling as part of the old A/C system. The simple fact that the vents were so high up made four an interesting challenge when removing the vent covers, especially in light of the fact that we only had a short step-stool on hand and, while his genes blessed Philip in many ways, they didn't exactly make him eight feet tall. So--in what you'll soon find is the infomercial-like catchphrase of this post--we improvised!

Kids, go ahead and try this at home! [/BadAdviceGuy]

As you can see in the highly scientific drawing, below, because the ducting runs flush to the ceiling, it's impossible to slide and screw into place a board behind the hole that could hold a piece of drywall in place.

DRAMATIZATION: "I'm the Air Conditioning Duct, and I'm going to go right to the edge of the ceiling so you can't slide any backing into the hole above the ceiling to patch the hole with! Muahahahaha!"

Our attempts to bend the round ducts' edges inward to create space to slide a backing board in place proved futile.


One of the holes we needed to patch. As you can see, bending in the ducting didn't work as it was fastened to the rafters somehow.

So what did we do? (EVERYONE: "We improvised!") That's right! We ended up testing two methods for overcoming this, one of which worked better*, and one of which worked not as well.

The Way that Worked Not As Well (But We Thought Would Work When We Did It!)

We cut a circle of drywall out of a wall that is still up on in our basement but that had a hole punched in it during our basement gutting (we felt pretty resourceful). But we intentionally cut a circle about three inches bigger in diameter than the hole. Then we removed about 1.5" of gyprock around the edge of the cutout, leaving just the papery coating. (To remove the gyprock from the paper, we found it easier to X-acto carve some tabs out of the paper that we could peel away one by one so that, in case one tab ripped, it wouldn't necessarily affect the rest.)
Here you can see me scoring the gyprock under the paper tabs so that it would break off more easily.

All this resulted in a circle of drywall that can slide into the hole with some paper tabs surrounding it which hold everything in place by being adhered to the ceiling using some mud. (Once again, I've provided a to-scale drawing of what we were dealing with.)

DRAMATIZATION: "I'm the green-tabbed patch! I'm a great idea... in theory!"
The idea was good. The result was a minor disaster. The mud adhering the paper tabs to the ceiling, the paper tabs themselves, and the mud covering the whole works up made for a thick layer that we had a heck of a time trying to smooth out.

Here's the patch mudded over. We tried and tried to mud it and sand it smooth, but were unsatisfied with the results.
Only after a couple of incredibly frustrating and tear-inducing days does it look passably good enough. And we're still considering someday climbing up there, cutting the whole thing out, and starting over. (Perhaps once we remove all that old A/C ducting from the attic, a job for a day in spring or fall when it's not too hot or cold up there.)


The Way that Worked Better* (But We Only Realized It After We Had Tried the Previous Method)

Because we had two holes to patch, one in our Master Bedroom (see above)  and one in our future Office (aka the Second Bedroom if you've Taken the Tour), and since the first hole went so swimmingly, we decided to try something different. What did we do? (EVERYONE: "We improvised!") You guys are really good at that! I tried to apply some lessons I learned from the previous method, an old lesson I seem to need to relearn every so often: The KISS principle.

No, this is not the principle that says "Life's better when you wear crazy makeup, call yourself Starchild and desire to rock and roll all night (and party e-ver-ree-day!). No, no, this is the other KISS principle: Keep It Simple, Stupid. (See? I can't even keep an explanation of the KISS principle simple.)

Here's the process in its entirety:
A. Cut a circle of drywall approximately the size of the duct.
B. Attempt to wedge it into the duct hole.
C. Shave off the parts that are preventing it from fitting into the duct hole.
...repeat this last pair of steps a bunch of times...
15. Actually wedge it into the duct hole.
16. Mud over!

It's so simple I almost didn't provide a highly-scientific AutoCAD-enhanced drawing to explain it, but I'm a completionist (except when it comes to Prison Break, which got worse and worse as the seasons went on, becoming intolerably bad by Season 4), so here it is:

DRAMATIZATION: "I'm stuck! Lassy, run and tell the sheriff that a little green patch is stuck in a hole!"
If you've been following along, however, you'll know that I've asterisked every time I've said this method worked better*. (Okay I'll stop now.) That's because, as you can see here, even this method didn't work perfectly. Somehow, despite multiple coats of mud and sanding until the drywall dust piled up like snowdrifts, we could not get it smooth. (That said, it's not something that shows up real well in photos, so you'll just have to take our word for it.)

We blame it on the fact that the colour of the ceiling and mud were so different, it hid the shadows that become so apparent now that it's all painted. So what did we do? (EVERYONE: "We improvised!") Wrong! We left it. Yup. We're learning that being perfectionists while renovating is a good way to lose your sanity, especially when you're still learning (like us).

Once we have paint on the walls, a new light fixture, and some furniture in the room, I'm sure we'll forget about it. But for now... well, leave a comment to let us know if you have a third method that's worked for you? We'd really appreciate it.

And before we go, Cass wanted to share this anecdote:
In case you thought we loved renovating, I'll share this story from our trip to Home Depot this evening. I had the most frustrating day (if you're wondering why, you need to go back and re-read this post) and so I was already a little overwhelmed. We walked into Home Depot--usually my happy place--and promptly waited something like 23 mins for help with getting info about the trim and casings we needed. The whole time, the anxiety level is rising within me. This in turn makes me start to sweat--the whole place feels like 42°C! I tell Philip he's on his own and walk away. So how do I soothe myself? (EVERYONE: "WE improvised!") Stop that! But you're right. Sort of. I went over to the carpet and flooring area and started stroking the carpet samples. 
Stop looking at me like I'm a crazy person. Yes, I was petting 5"-square pieces of thick-piled rug! So what? It helped!
I admit it was a bit ridiculous. Philip stayed and talked to the employees there and I was just standing a few aisles over, staring into space, and literally rubbing carpet in order to calm down. Honestly, I recommend it for anyone who's in a home improvement store and feeling a little stressed. There are carpet samples somewhere nearby... go find them!
There you have it! Next time somebody's freaking out at you, you can tell them to "go stroke a rug!" Actually, maybe don't. That might be misinterpreted.

So, in the comments, leave your ceiling-duct vent patching advice, and if you have any other great hardware store relaxation methods (flicking switches in the electrical area? reorganizing paint chips by name instead of colour?), feel free to add those in too!