Showing posts with label Friday Phil. Show all posts

Friday, 17 May 2013

Philip's Official 2013 Birthday List

What? A Friday Phil post? Yes, it's been a while, and this post is even late in the day.
But there's only one way to get back on a horse, and that's to just go ahead and do it! (Or so I'm told, I've never done it.)
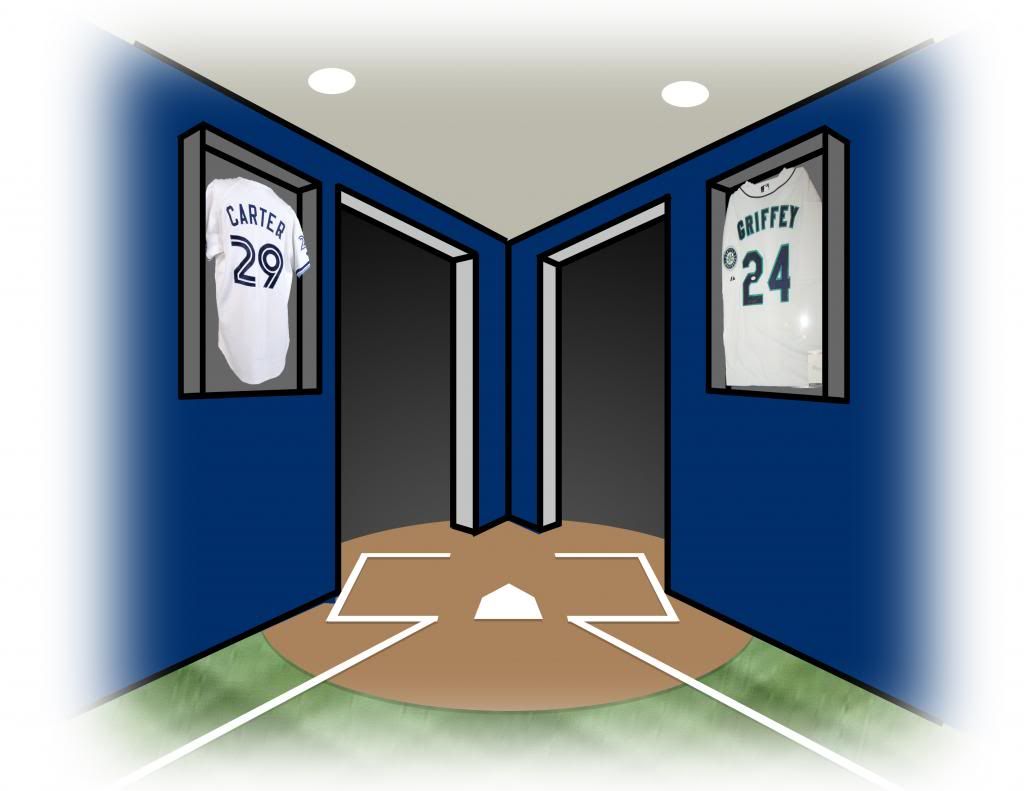
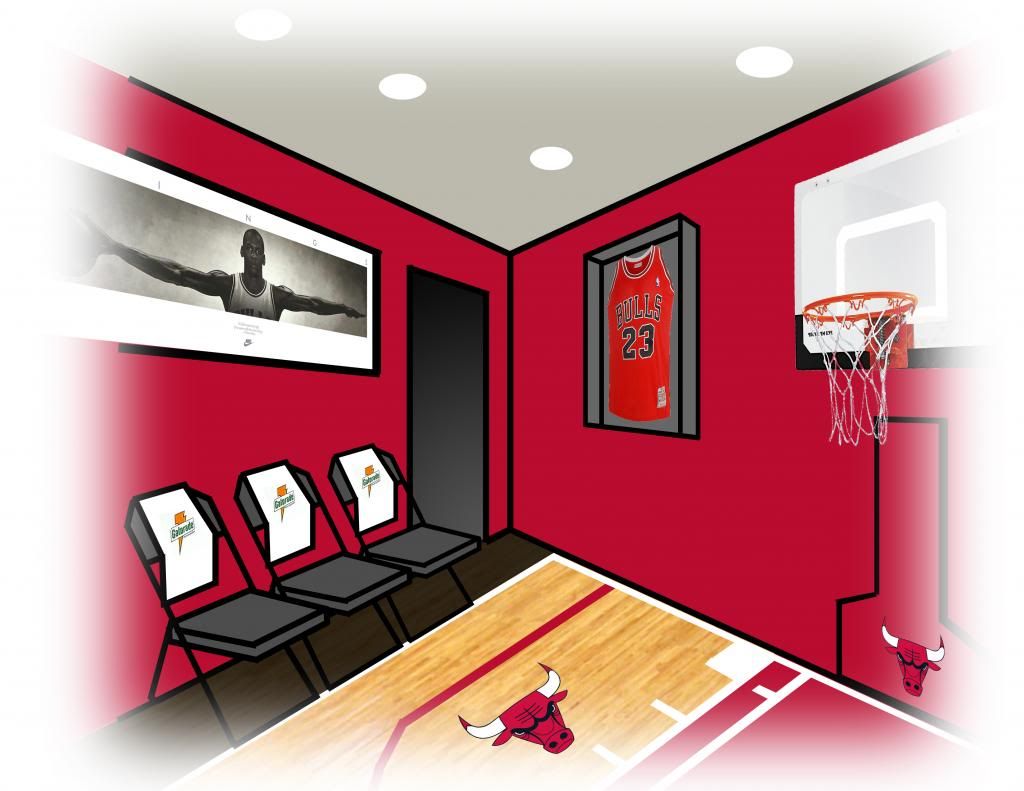
The rest of my sports room post will get published shortly. Suffice it to say, it was a bigger undertaking than I anticipated; each image took me approximately two hours to produce, and that kind of time is hard to set aside. So in the interim, you get the following:

This weekend is not only a long weekend in Canada, it's my birthday weekend. Yes, Queen Victoria and I are sharing a day for our respective festivities. A particular tradition of mine--as it is for many people--is making a birthday list.
Now, people say I go overboard with it. I just think I do a good job of organizing it; true, in the past, I've supplied prices, places to buy the items, even themed title pages. This year, I scaled it back a little, which meant only listing the product and a link to where you can buy it online (more for the benefit of my own family than you readers, but hey, don't let that stop you!). So without further ado...

Philip’s Birthday List

Movies/TV

A number of boxed sets top this list, led by the award-winning sports documentary series 30 for 30, which I missed when it aired originally but am really interested in catching up on.
  1. ESPN 30 for 30 Collector's Set (Blu-Ray Boxed Set)
  2. Friday Night Lights - Season 3 (DVD Boxed Set)
  3. The Pacific (Blu-Ray Boxed Set)
  4. Mad Men: Season 3 (Blu-Ray Boxed Set)
  5. Any Pixar Movie (Blu-Ray)
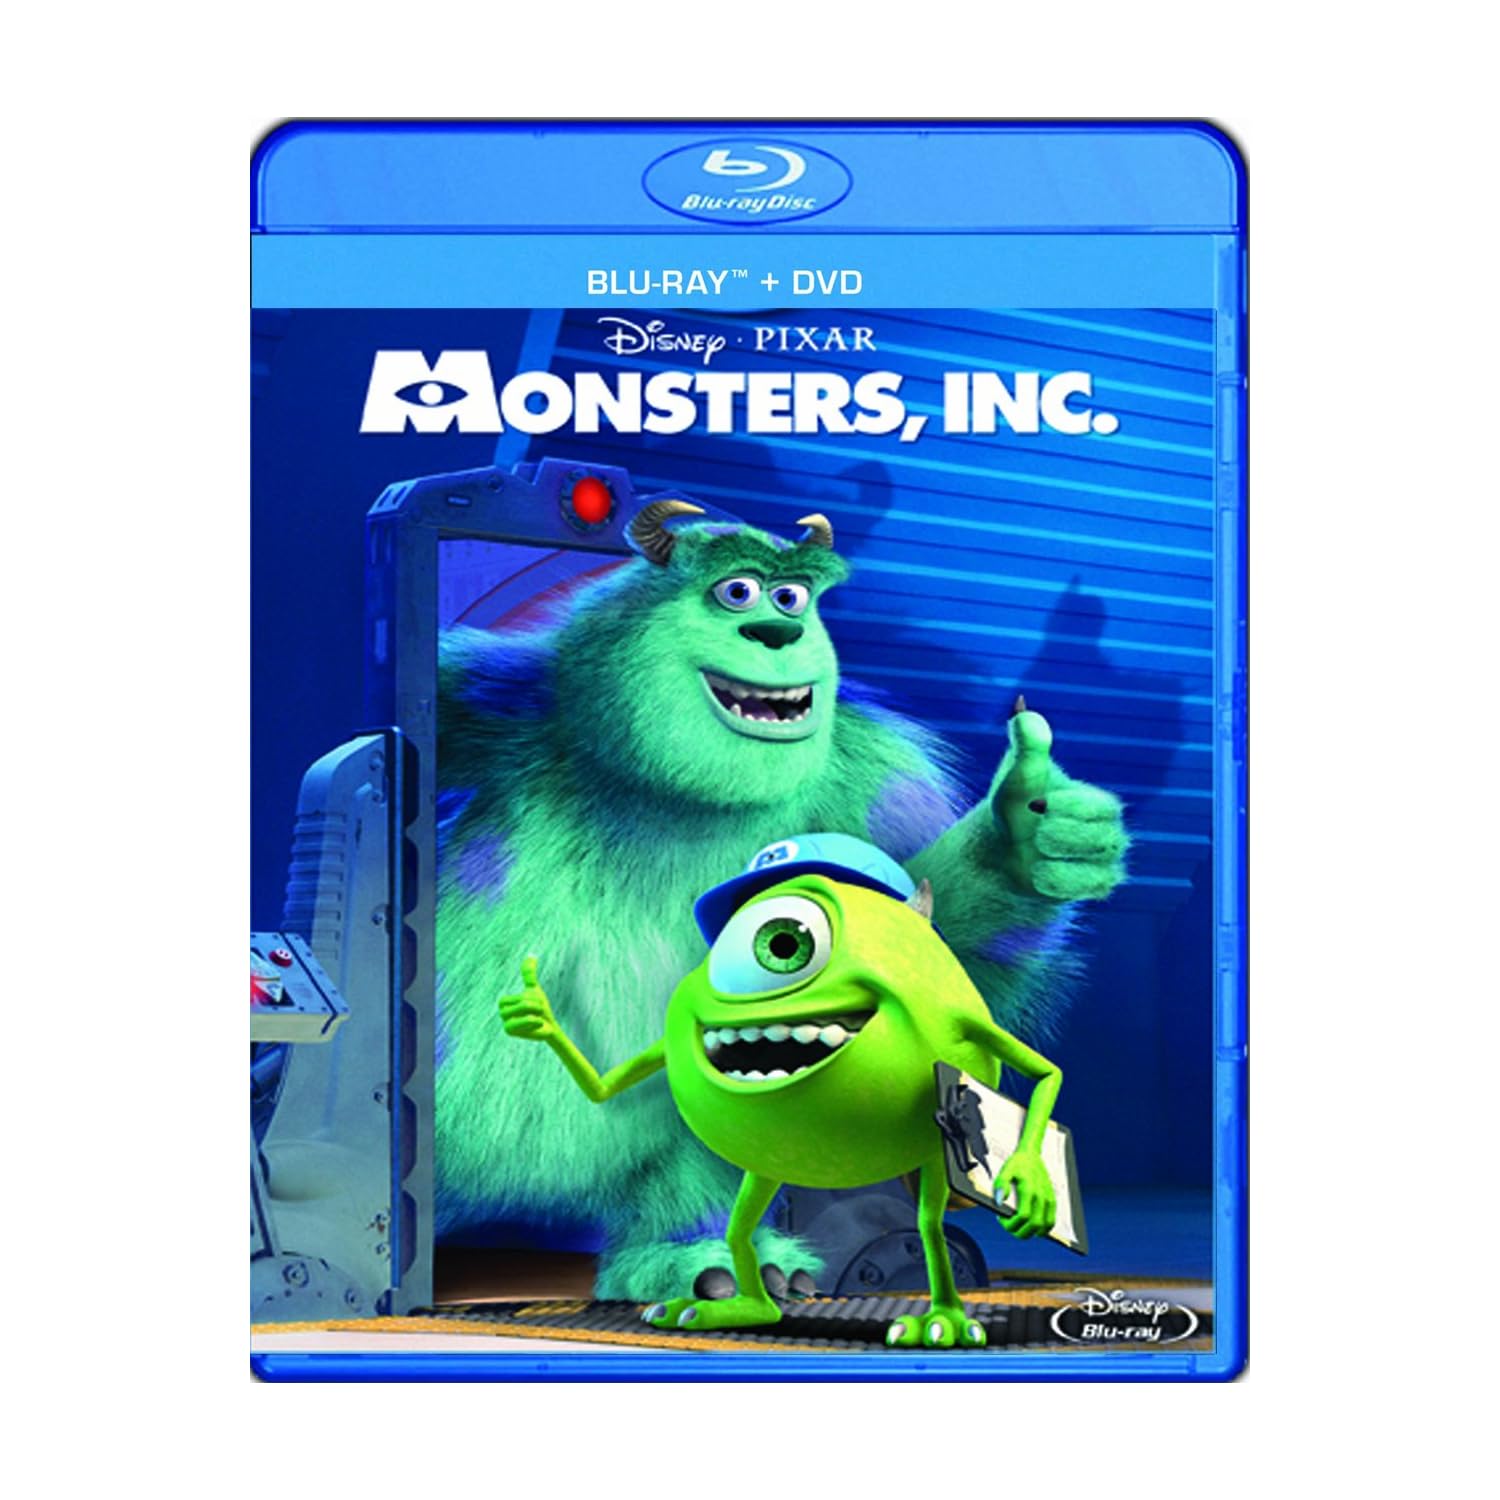
Oh yeah, and Pixar movies. Save for Cars 2, you just can't go wrong.

Books


I'm all over the map here. A list featuring two spy novels, a young adult series' boxed set, and a literary classic is topped by (what Bill Simmons insists is) the greatest sports book of all time. 
  1. David Halberstam: The Breaks of the Game (Hardcover)
  2. John Le Carre: The Spy Who Came In From the Cold (Hardcover)
  3. Rick Riordan: Percy Jackson and the Olympians Series (Hardcover Boxed Set)
  4. Fredrick Forsyth: The Day of the Jackal (Hardcover)
  5. Gustave Flaubert: Madame Bovary (Hardcover)
A young writer I know recommended these to me, because I liked Harry Potter. Sold.

Games

I don't get to play video games nearly as much as I'd like anymore, and I play more board games now than I ever have. It's the price you pay for being married, my single male friends, and believe me, it's quite alright with me. That said, I've played every iteration of the Civilization series since #2, and I don't intend on ending that streak quite yet.
  1. Sid Meier’s Civilization V: Gold Edition (PC-DVD)
  2. Ticket to Ride: USA 1910 Expansion (Board Game)
  3. EA Sports 08 Collection (PC-DVD)
  4. Days of Wonder: Mystery Express (Board Game)
  5. The Logo Board Game (Board Game)

Nothing wrong with setting the difficulty to "Settler" and beating up on some Carthaginians.

Music

The way I enjoy music has changed since I discovered Noisetrade. That said, my love affair with the physical CD hasn't quite ended yet, particularly with the variety of new music I discover through RELEVANT Magazine and their fantastic podcast.

  1. Needtobreathe: The Heat (Audio CD)
  2. Broken Bells: self-titled (Audio CD)
  3. The Lumineers: self-titled (Audio CD)
  4. Foster the People: Torches (Audio CD)
  5. The Black Keys: Brothers (Audio CD)
This is an item on my birthday list.

Tools

This is the first birthday list to feature a category this practical, after my Christmas list broke the practicality barrier for lists overall. I've been lucky enough to have gotten a lot of the basic tools from my grandpa's old tool kit, as well as some pleasant surprises at Christmas time and throughout the past two years. And now it's time to venture into the world of scary, destructive tools.
  1. Circular Saw
  2. Reciprocating Saw
  3. Random Orbital Sander
  4. Tiling Wet Saw
  5. Tool Chest
It's time, fear of saws, thy reckoning has come.

Clothes
  1. Anaheim Mighty Ducks 1997 Alternate Away Jersey
  2. Winnipeg Jets “Hawerchuk #10” 1979 Vintage Away Jersey
  3. Dress Shoes
  4. Golf Shirts
  5. Dress Shirts
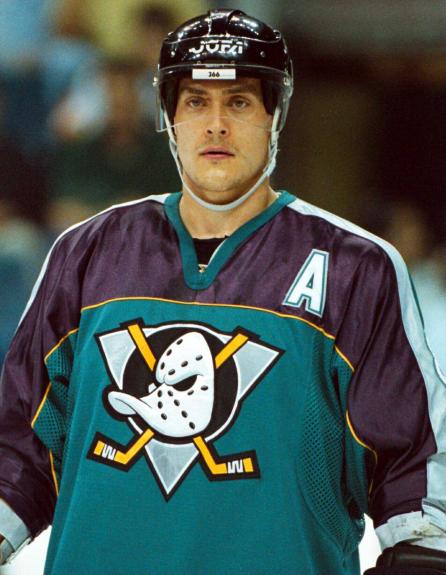
There are a lot of unique jerseys in NHL history.
There are a lot of nice jerseys in NHL history.
This is one of the few that fits in both.

Household Gadgets

This is perhaps the most fun category for readers of this blog. There's a few electronics-related products, plus a couple kitchen gadgets. If you read our Would You Tues? post from this week, #3 should come as no surprise.
  1. Laptop Chill Mat (for up to 17” laptops)
  2. iPhone 4 Car Mount
  3. Fred & Friends Gin & Titonic Ice Cube Tray
  4. Breadmaker
  5. iPad
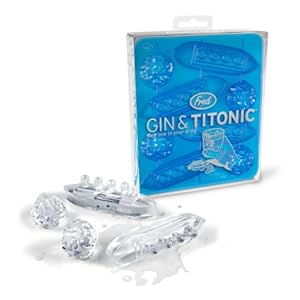
"I'm cooling, Jack, I'm cooling!"

Projects

In case our parents are reading this, this is the category where we watch while you work! (Just kidding. We'll be busy documenting your work for this here blog.)
  1. New Garage Doors/Openers
  2. Beam for our Living Room/Kitchen Wall
  3. Bathroom Flooring
  4. Paint
  5. New Interior Doors

As awesome as it would be to have a can of paint in all these colours, where would I store it all? A gift card would have to do.
That's all for this year's list.
Are you a May birthday? If so, what are you hoping shows up under the Birthday Tree? If not, what are you getting me? ;)

Saturday, 23 March 2013

My (Pipe) Dream: A Sports Room


Happy Saturday everyone! Philip here. This was supposed to be the latest Friday Phil post, but turns out I bit off more than I can chew with this one. That's why you got Saturday's usual "Other Stuff" post early. That's also why ths'll have to serve as Part 1 of 2 (or more, if I come up with more ridiculous pipe dreams).

Today's post is a doozy of pure Philip-ness, so be forewarned!
 

Since before I became a homeowner and therefore master of my own decorating domain, I've dreamed of creating spaces that isolate down the most pure representations of my interests. As a kid, I really wanted a Lego room. Not a room made out of Lego, but a room overrun by a Lego universe. And although that still sounds seriously awesome, these days, beyond Jesus/Cass/family/friends, there are two interests that rise above all others: Sports and Movies.

Today, I'm going to talk about my Dream Sports Room.
 

Okay, before I begin, I admit it: as the title suggests, this is a bit of a pipe dream. The room I'm envisioning is heavily customized and would be horrible for resale (except for someone with the exact same interests as me, who might still hate it). It wouldn't necessarily be kid-friendly. It would take up the lion's share of our basement. It would be expensive. For all these reasons, my wife would hate it. But I share this with you because, if we do not have our dreams, what do we have?

First off, the main function of the room would be a place to relax with friends, to watch sports and play games like pool and table tennis. For this reason, the room would need to be fairly large; a full-size basement rec room should suffice, provided you can convert the pool table into a ping pong table. (Is that a thing, beyond kiddy-sized tables? It so should be. I'm gonna check it out. I'll check back with you in a bit.)


Anyway, the room is divided into half lengthwise and widthwise, as to make four distinct sections? Why do we need four sections? Because my love extends to all four major sports. (For some of you, the horror of what I'm about to roll out here is beginning to take hold.)
The quarters would be distinguished in a few ways. I was going to describe it all for you, but I figured I'd save myself a few thousand words and draw some pictures. Notes to highlight the important parts are included.

Baseball Quarter: Welcome to the Sports Room


  1. This part is modeled after my favourite baseball team of all time, the 1992/1993 Toronto Blue Jays, repeat World Series Champions. 
  2. This corner would serve as the primary entryway into the Sports Room; as a result, the size, level of customization, and usefulness of this area is limited. ("Limited?" you say. "That doesn't look like 'limited' customization!" Just you wait, my friend.) Suffice it to say, I love baseball, but when push comes to shove, it's the sport that most often takes a back seat.
  3. The walls are Blue Jays blue. Obviously.
  4. The walls feature some framed jerseys, which I collect.*
  5. The flooring is again customized: using various colours of carpeting, we would recreate the look of a baseball diamond, particularly the home plate area. I like how this opens up the room using the baselines. I would also find it very difficult to exit the room from the left side of it, simply because you can't go straight home from 1st base.

*At this point, that revelation shouldn't come as much of a surprise.

Basketball Quarter: Ping Pong/Pool Table Area

  1. Modeled after my favourite basketball team of all time, the '97-'98 Chicago Bulls, and their home, the United Centre. It'd be one of the bigger areas of the room, simply because a pool/ping pong table would be a fairly large installation. Plus, as a pre-teen in the Bulls' heyday, those teams rocked my world.
  2. The walls are painted Bulls red. Again, obviously.
  3. The flooring is hardwood. Yes, I'd be tempted to put down parquet, because it looks cool and a basketball-themed area begs for it, but a) I'm no Celtics fan and b) the United Centre doesn't have it so I won't. The hardwood would have lines painted on them to mimic a basketball sideline, baseline, three-point line and key.
  4. You can't see the Table Tennis/Pool table. The photo is taken from where it would be set up. How would it be basketball themed? Good question. There are 6 pockets on a pool table, the same number of NBA titles won by the Bulls in the '90s. Or we could just draw basketball court lines on the felt/hard top of the various tables. I haven't quite figured this part out.
  5. A half-sized hoop and plexiglass backboard would hang on one wall. 
  6. Along the sideline, for those not currently in the (pool or table tennis) game we would have folding chairs designed to look like the players' bench, down to the Gatorade towels hanging over them. 
  7. Hanging on this wall (and on either side of the hoop) are framed jerseys and my framed Michael Jordan: Wings poster, which is currently languishing in the basement, waiting for its place of honour.
Well, that's Part 1 of my Sports Room. Next week I'll reveal the other two corners of the room, which in my humble opinion are the two most creative, as well as a bird's-eye proposed layout for the room, because I know you're clamouring for it already!

In the meantime, use the comments below to let us know if you've ever had a dream for a crazy, resale-unfriendly room based on an interest of yours? Or if you're into sports like me and you made a sports room, how would you customize it?

Friday, 15 March 2013

Window Shopping What-the...?

Cass has been enjoying running our new Window Shopping Wednesday pieces lately, but the way I see it, talking about just the cool stuff is throwing the universe out of balance a bit. This is misrepresenting my shopping experience; I spend so much of my time at many of these stores asking "WTF?" (Not literally Mom!)

Some stores inspire this more than others. The more eclectic and decor-focused the inventory, the more rich the "What-the Factor" (see what I did there?). So Superstore and even IKEA are not going to show up much in this space, whereas Pier 1 Imports is a veritable land flowing with milk and honey bee dining cushions.

So today, as my usual Friday Phil guest spot, we explore the other side of Window Shopping. In fact, we went to one of our favourite stores, Urban Barn, and found a wealth of weird.

I even have come up with my own, proprietary "WTFactor™" that measures weirdness on a scale of 1-10 using a unit I'll just refer to as "björks". (Should be self-explanatory, but if not: this. And this.) To get a sense of the scale we're working with:
  • 0 björks means an item is totally normal. A plain pencil or a white t-shirt would earn 0 björks.
  • An item with a WTFactor™ of 5 björks would be something that, if you displayed it in your home, would make your friends wonder if you've gone off your meds.
  • An item that earns a perfect score of 10/10 björks would be one that you could rope off your front door and charge admission to see, but only if Ripley's Believe It Or Not didn't sue you for idea-infringement.

All clear? Let's begin...

Disclaimer: In all cases, you can see larger versions of the photos by clicking on them. But don't blame me for the quality; I was working with an iPhone camera and trying not to attract too much attention as I was snapping away.


From the "Hyper-Specialized Tableware" department, these pizza plates are cool, except who has room in their cupboards for plates that you can only use if you're eating pizza? You could use them for all slice-shaped foods, including cakes and pies, but the plates are labelled "Pizza" and, seriously, what kind of commoner doesn't already have cake-specific and pie-specific plates?
WTFactor™: 2.9/10 björks


*Small warning: link contains a bad word, and might not be safe if there are little ones in earshot.
WTFactor™: 3.1/10 björks


"This food tastes like death! Could you pass the salt?
...Oh. Never mind."
WTFactor™: 4.4/10 björks


"I know it must be intentional. But it does look off doesn't it? But they must have meant it to look like that. But it does look a little off."
Two hours later...
"But what if it actually starts to break... How will I know if it's leaning more than usual? But they meant for it to be like this! Aghh! Take it back, Urban Barn, take it back!"
WTFactor™ of the lamp: 5.2/10 björks
WTFactor™ of my description: 10.0/10 björks (Take that, Mary-Lou Retton!)


Urban Barn focus group participant: "See, I'm going for this horse-themed room, but like, it's going to be classy, right? But I'm looking for lamps in all the stores and finding, like, nothing!"
Urban Barn executive: "Somebody solve this problem or heads will roll!"
WTFactor™: 5.9/10 björks


And yet, the movie industry does this, All. The. Time. And we're apparently totally okay with that.
WTFactor™: 6.2/10 björks


"For the farmer in your life who sleeps far too comfortably, get them this pillow to remind them just before they fall asleep: 'locusts.'"
WTFactor™: 7.3/10 björks


Apparently "Bling" culture-subscribers have grown out of their Juicy Couture sweats (or not) and Urban Barn now feels the need to court their business. But 1000 points to anyone who can point to a place where these pillows are legitimately used as decor.
WTFactor™: 7.8/10 björks


Cool, a black ceramic gorilla. That's kinda neat.
WTFactor™: 1.3/10 björks
I mean, why would you even post that...


Oh. It's actually an uncomfortably-bulbous black ceramic gorilla, who's mirror-finish has the tendency to blind passers-by using light reflected off its pronounced gluteus maximi.
WTFactor™: 7.9/10 björks, +1 björk just for how uncomfortable it made me to take this photo. Let's just say, I got looks.


I'm so confused. I mean, what are these for? How-? Wha-? Never mind, I'm just going to give it...
WTFactor™: 8.7/10 björks
...and keep moving.


We have a winner! not only are these amazingly weird, they are also seriously awesome. I mean, I don't know where you would display them--except for all over your house! I'm just happy to live in a world where these exist.
WTFactor™: 12.9/10 björks


...and just to prove I'm not just a peanut-gallery laugh track, here's something I thought was actually cool. I'm not sure it would find a place in our house, but it's got a neat mix of fun and style. Kudos, Urban Barn.
WTFactor™: 1.2/10 björks

That wraps it up! Anybody else come across anything truly weird at a decor store lately? Did you take a picture of it? Link to it in the comments, and we can all chime in with how many björks it truly deserves.

Friday, 8 March 2013

Putting the "Fast" in "Fastening the Railing Properly..."

"...So My Wife Doesn't Hurt Herself More"


TGIFP, am I right? Philip here, and I'm here to tell you that you've been heard: You're tired of hearing our excuses about why our bathroom isn't moving faster or why we missed a whole week of posts. (If you need a refresher, this should catch you up.)

The bracket's lip had worn smooth, so the railing could slide right off.

But that being said, Cass' tumble quickly reprioritized (no, Autocorrect, not "reptile irises") what we needed to get done.

For instance, because Cass was going to need to do some stairs with a subpar ankle, one thing that jumped to the top of our list was stabilizing the railing along the basement stairs.

See, over time, the railing had worn away the lip on the top bracket that holds it in place, and could slide on and off the bracket at will. When you're trying not to fall down, leaning on a railing with 8 inches of play isn't fun.

Now replacing a bracket isn't tough. You need a screwdriver and/or drill and a bracket set that has everything else you need and can be bought at Home Depot for under $5.

However, replacing the bracket when you're under the gun for time--perhaps running late for supper at your in-laws--and being asked to respond to a number of requests because you're into the last few rehearsals of a play you're directing, well that just makes things more fun, don't it? So I decided to document the process and just how much time it took me so that if you are ever called upon to do likewise, you'll be ready!

4:57pm

Start the clock.

I start with these supplies. A magnetic screwdriver set and a bracket package.

I plunk myself down at the top of the stairs with only our storm door closed in our side landing to permit the maximum amount of light in while still preventing the -20C wind from blowing in.

I attack the existing setup with the unscrewing fury of a... a... ummm... no time for metaphors! I get the "female" end of the bracket off the railing first, then the bracket off the wall. (If it had just been the female end that was broken, I would have only needed to remove it; but as it is, the female end has to clasp over the male end once "he" is in place. Wait, didn't I say no time for metaphors?)

Unscrewing the "female end." Let's all be mature about my choice of terminology.

At this point, in the midst of my hurrying, I got a phone call. From my wife. (Can't hit "Ignore" on those.) I don't remember the conversation exactly, but I think it was something like...

Her: "Where are you at?"
Me: "Home"
Her: "What're you doin-"
Me: "Fixing the railing."
Her: "Oh, you got the par-"
Me: "Yep. Listen, I'm in a race against the clock here. Can I call you back?"
Her: "Is this for the blog?"
Me: "Depends."
Her: "On what?"
Me: "How embarrassing my final time is."
Her: "Well then why are you talking on the phone?"
Me: "You call-"
Her: "MOVE, Soldier! Loveyoubye!"

Okay, so now that the bracket was off the wall and the female end was off the railing, it was time to tear into the new package. I used the new screws in the old holes because I knew that the holes in the wall weren't what was causing the railing to be loose.

However, PRO TIP, as you're attaching the new bracket to the wall, consider holding the railing in place to see where the female end would clasp over it, so you can make sure to attach the bracket in a way that allows you to reuse the holes on the railing.

Silly me. I was taking pictures when I should have been checking to see whether the bracket would line up with the old holes for the female end.

I didn't do that, however, so when it came time for me to clasp the female end over the bracket and secure the female end to the railing, the screwholes in the female end weren't lining up. (Okay, let's all be adults about this, I know we're way overdue for a "That's what he said!")

And trying to screw the screws into the solid wood of the railing by hand was proving to be a challenge, so--not having a drill on hand--I improvised: I grabbed a brad nail and a hammer, and somehow held the female end in place so I knew where to make my guide holes. (Don't complain that there's no picture of this, I don't have 8 hands!)

I should mention, as I was doing this, I got the second phone call in less than 5 minutes. It was a pastor at my church, on his way to rent some equipment for our Dinner Theatre production and checking to see if there's anything I needed. I'm not even going to try to paraphrase that conversation--my mind was totally elsewhere, so I probably sounded like I had the IQ of a sack of hammers. And in my head, I could just see the clock ticking, precious seconds being lost in my race against I'm-still-not-sure-what.

Back to the job: Even with the new guide holes in place, screwing into the railing was a challenge, and with all the hand screwing, my wrists were getting sore. (Careful...) But with a little elbow grease, I had securely fastened the female end to the railing.

I stepped back and observed my work and took a glance at the clock.

"25 minutes, a newwww state record!"

5:22

Including the two phone calls (which I verified with the screen capture of my Recent Incoming Calls, since I know the Guiness Book of Records people will want to know) it took me almost exactly 25 minutes to get the job done.

That's right. Check the timestamps. I have photographic evidence of the distractions I had to fight through.

Nothing amazing for a professional railing installer (Bannisteer? Balustradesman? I'll go with Bannisteer), but for a guy who can be a bit of a perfectionist and who has a habit of staring off into space in the midst of projects, not bad.

Now, if only I could polish off our bathroom in that kind of timeframe...

Friday, 1 March 2013

Demolition Man Redux

It's time for your weekly dose of Philip. Please note side effects may include nausea, drowning, and Dutch Elm Disease.

Before we get too far, just wanted to point out that we're on top of our banner switch! It's March now which, in Winnipeg, means that spring is here! winter will occasionally tease us with some above-freezing temperatures, but we'll still realistically have snow on the ground when April hits. Which is why our banner is featuring Concetta, our once-busty snowwoman, and our biggest March point of progress, our new blinds (showing off their cool top-down/bottom-up capabilities).


But on to the topic at hand.


If you read regularly, you've heard a lot about our bathroom renovation, and more specifically how it's been stalled. But we haven't taken the time to detail the work that has been done. That changes today!


I titled this post "Demolition Man Redux" in honour of the inaugural Friday Phil, because gutting a bathroom is a lot like gutting a basement.

Well, not quite. I mean, it's close to the same thing, except everywhere you look there's:
  • a pipe you shouldn't dent,
  • a wire you shouldn't nick,
  • a new window you shouldn't crack
  • or a wall you have to tear out carefully so you don't put a hole in the spare bedroom wall next door.
Oh, and when you're working in there with even just two people, it feels like you're working inside a room the size of a milk crate. (Note from editor, some of us young folk don't understand this analogy)
But, apart from those 200 words, it's just like gutting a basement. It comes apart in 6 easy medium-difficulty you're-still-not-done-after-completing-them steps.

Step 1: Getting the water shut off

But seriously; step one was getting the water shut off. Our plumber came by, had a look, and in relatively short order had created a detour so water could be shut off to the upstairs bathroom and not the downstairs as this bathroom didn't have a shut off valve (hooray for not having to pee in a bucket!).

Step 2: Remove the vanity, tub, and toilet

Of these three, the most difficult was the tub. The vanity popped off with only a few nails holding it back. Once the toilet was empty and shut off, it too came off with only a couple screws holding it down. (Pro tip? No matter how much you try, there will always be a little water left in the toilet somewhere, so put it down on a tarp or towel and have some tags ready for drips during transit.) But the tub was a different story. A big metal tub bolted to the studs for 30 or so years does not come easily. With my dad's help, we were able to unhook all the pipe connections (in some cases cutting right through them), pry it off the studs, and haul the thing out our front door. (Thankfully the detached tub wasn't too heavy; definitely manageable for a team of two.) I'm pretty sure all the prying, bracing against the studs took a bit of a toll on our house; since that time a large crack has appeared in the plaster on the other side of the bathtub wall (in our side door landing).

Step 3: Remove the plaster/drywall, deconstruct the linen closet

This was dusty work, made more difficult since the broken plaster/drywall had to be hauled through the house to get it out. Plus, the walls hide these metal corner meshes that they use to put up plaster. They hide and are hard to remove, but when they finally let go, it's satisfying like getting all the glue off a granola bar wrapper. (What, that's just me? Okay, moving on...) Fortunately, taking out the linen closet was simpler, just requiring some elbow grease and a wrecking bar for leverage. Oh, and a hard hat would've helped when the one 2x4 broke and 4 feet of its nail-embedded length caught the top of my head. Escaped without a scratch, but those were a few terrifying seconds.

This is where we were at during this step...and nothing has changed. 

See ya, bathtub. 

Step 4: Replace the ceiling, a.k.a. $#!@*%

If you're asking me why the bathroom isn't
done yet, this right here is why.
So we want to put up a ventilation fan and pot light over the shower. Plus, it looked like there might be some discoloration or even mould in one corner. "Let's just re-drywall the ceiling!" We thought. "Muahahaha," our house laughed evilly.
With the help of my good friend Alan, we started carefully pulling back the drywall, trying not to puncture the vapour barrier behind it. Immediately upon discovering wood-shaving insulation and old, thin (2mm) vapour barrier, he recommended we climb up into the attic and sweep the area above the bathroom clear of insulation. In retrospect, this would have been a real pain (especially working in an uninsulated attic in Winnipeg in January), but would have probably been a faster pain than what we've ended up with.
I decided to try to preserve the existing setup, and lo and behold the wood shaving insulation (and the blown insulation our home inspection has led us to assume is on top of it) collected in the lowest spots, dragging those down further and causing the vapour barrier to pop of the joists in a few spots. Of course, now the shavings have really collected below the joist, and there's no hope of ever reattaching that vapour barrier to the joists.

Step 5: Have your wife sprain her foot and write/direct a feature-length stage production

I didn't quite fall into a burning ring o' fire, but when I write
and direct, I walk the line... Okay, I'll stop.
Just kidding. Don't do this if you want to get your bathroom done quickly and efficiently. (Though I'd fully recommend writing and directing for the stage. It's been a 2 weeks since our production wrapped and I'm experiencing withdrawal. Not quite chain-me-to-the-radiator-June-Carter levels, but close.)


Step 6: Figure out a solution to our ceiling/attic insulation issue

This is the step we're in right now.

What's the solution to our current woes? We're trying to find that out from a few experts, but I you have expertise/input/ideas, we'd love to hear them in the comments below! Of course we'll be updating you as we go, so stay tuned!

Friday, 4 January 2013

DIY Gift: Vow Art

Yesterday you heard about my date jar gift to Philip, and so today we'll be talking about the homemade gift that I received from Philip. While it is Friday and Philip is the typical author of today's post, he's busy enough writing the drama for our church's dinner theater (at Eastview around Valentine's Day if you want to mark your calendars), so I'm taking this one for the team. I won't try to incorporate him in this post with a painting like I did my date jar yesterday (phone randomly fixed itself, so there is an actual photo over there today!)

When preparing to write this post he emailed me everything I'd need to know about how he came to make this beautiful craft, and so hopefully I can do it justice.

After seeing some great pieces of art that featured wedding vows or other wedding memorabilia, I had been hinting pretty heavily that I'd like something similar. Here are a few of the pieces that I had shown to Philip but didn't want to buy because I knew Philip could easily make something amazing and it would be more meaningful than buying it off Etsy.


I heart this personalized print from Silhouette Blue.


While I don't need Train lyrics on my wall,
 I like the graphic feel from Alexander Creative.
I really love the idea of personalized art (I think I've mentioned that before), and so it was really thoughtful of Philip to take that into consideration and make me an amazing Christmas gift.

Philip started with a completely different idea than what he ended up with. Beginning with an owl inspired (due to the owl trend that's invading the stores these days - and I might have allowed it to come into our house a bit) piece. 

While this is really cute,
I'm so much happier with what Philip ended up with!

The goal with the owl artwork was a layered and textured feel, looking custom and professional, but also really cute and fun. It didn't work out because pencil crayon on black construction paper didn't work as well as Philip had hoped, and the owls ended up looking a lot more juvenile (although I do still love the owls that he made and will definitely hang them somewhere) than what the content would call for. 

I'll still give a bit of a run through on how to make the artwork above, if it's your groove.

Philip started by printing the vows and adhering them to black construction paper with Post-Its (so that the construction paper wouldn't be damaged when it was removed). This way he could trace the letters onto the construction paper below to achieve the font and look he'd planned. 

An innovative use of Post-Its. 

Philip had designed the owls ahead of time on the computer so he had a plan when it came time to craft.


Cutie owls, I do still really like them!

After creating the owls virtually, cutting them out of construction paper in layers was a lot easier and well planned out. It turned out so adorable! I can't wait to hang them up. Have I mentioned how talented my husband is? I couldn't make that on the computer, and I'm definitely not a master of using scissors, can't even imagine how long it would take me to make that tree trunk out of the different papers, let alone the owls. 


The most beautiful construction paper craft I've seen to date.


These owls get their close up.
Anyway, this craft didn't work out for reasons mentioned above, and overall Philip just didn't like how it was looking. So he moved on to another plan, which took about the same amount of time as this failed attempt.

Philip changed to a simpler design, one that he found airy and knew would look great in the white matted white frame that he'd purchased, as well as on any of our wall colors. He went with the colors from our wedding invitations, yellow and grey, because it was definitely a reminder of our beautiful backyard wedding. 

He started similarly to the owl print, by getting the text onto the paper he wanted to use. That's one thing I really appreciate about the artwork he made, he could have easily printed it off the computer, but he hand wrote everything. 

Philip wrote our vows in a heart shape, the left side with my vows and the right side his.  (In the background you can see how he made a light table out of a reading lamp propped up under our glass desk.)
Philip wrote our vows in a heart shape (you can kind of see that above), the words were written in yellow, with the verbs in grey. The left hand side are my vows to him, and the right side are his. Then at the bottom he included our wedding date, August 6, 2011. I have wanted to have our vows framed somewhere in our house for a while, I like the idea of seeing our promises each day and using them as accountability and reminders of what we want for our marriage. 

Philip then cut them out, into two separate heart halves, and glued it on to yellow construction paper, in order to make it a little bit more 3D, similar to the effect that was meant with the owl art. 

All done, just needed to cut the mat.
After finishing up, Philip cut the mat to make room for the artwork inside. I love how it has a bit of a monochromatic and airy look, will definitely go with any kind of paint color or decor that we have in the room it hangs in. 

We opened our gifts first thing in the morning, which is why I'm looking a little sleepy and wearing an always flattering Seattle Mariners t-shirt.
I was so shocked to open it and love it like crazy. I can't wait to hang it up in our bedroom with some wedding photos. I still can't believe we've already been married for almost 2 years, it definitely doesn't seem that long! 

My favourite part of making crafts for each other was probably the fact that none of our rooms have doors right now, so we worked in opposite corners of the house with Christmas music blasting so we couldn't accidentally hear any hints. 

Anyone else make a creative Christmas gift or get surprised by their spouse? Almost done with Christmas posts a week into 2013, on Monday I'll share one other quick anyone-can-do craft that might help with cleaning up your Christmas decorations a bit, and then on to 2013! Make sure to vote in this weeks poll on the Facebook page and on Tuesday you'll hear about our resolutions! Have a great weekend!